0. Introduction
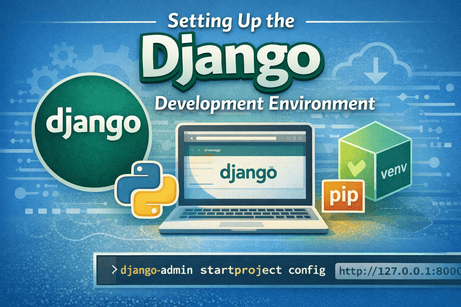
Before building websites with Django, you need to prepare your development environment correctly. A good environment helps you install the right tools, avoid dependency problems, and run your Django projects smoothly. In this tutorial, you will learn how to install Python, create a virtual environment, install Django, start your first project, and run the local development server.
This is one of the most important first steps for every Django beginner because it creates the foundation for all the tutorials that come next.
1. What Is a Development Environment?
A development environment is the set of tools and software you use to write, run, and test your code.
For Django development, the basic environment usually includes:
- Python
- pip
- a code editor
- a virtual environment
- Django itself
- a terminal or command prompt
Once these tools are installed and configured, you can start building Django applications on your machine.
2. Installing Python
Django is built with Python, so the first thing you need is Python installed on your computer.
Check if Python is already installed
Open your terminal or command prompt and run:
python --versionOn some systems, especially Linux and macOS, you may need:
python3 --versionIf Python is installed, you will see a version number such as:
Python 3.12.2If it is not installed, download it from the official Python website and install it.
Important note for Windows users
When installing Python on Windows, make sure to check the option:
Add Python to PATH
This allows you to use Python from the command prompt.
3. Installing pip
pip is Python’s package manager. It is used to install Django and other Python libraries.
To check if pip is installed, run:
pip --versionOr:
pip3 --versionYou should see something like:
pip 24.0 from ...In most Python installations, pip is already included by default.
4. Choosing a Code Editor
You can write Django code in any text editor, but some editors make development easier.
Popular choices include:
- VS Code
- PyCharm
- Sublime Text
- Vim
For beginners, VS Code is often a very good choice because it is simple, modern, and has many useful extensions for Python and Django.
Useful extensions in VS Code include:
- Python
- Pylance
- Django
- HTML/CSS support
5. Why You Should Use a Virtual Environment
A virtual environment is an isolated Python environment for a specific project.
This means each Django project can have its own:
- Django version
- package versions
- dependencies
Without a virtual environment, packages are installed globally on your system, which can create conflicts between projects.
Example
One project may use Django 4.x, while another may use Django 5.x. A virtual environment keeps them separate.
Using a virtual environment is considered a best practice in Python development.
6. Creating a Project Folder
Before creating the virtual environment, make a folder for your Django project.
Example:
mkdir my_django_project
cd my_django_project
This folder will contain your virtual environment and your Django project files.
7. Creating a Virtual Environment
Now create the virtual environment.
On Windows
python -m venv venvOn Linux/macOS
python3 -m venv venvThis creates a folder named venv containing an isolated Python setup for your project.
8. Activating the Virtual Environment
After creating the virtual environment, you must activate it.
On Windows
venv\Scripts\activateOn Linux/macOS
source venv/bin/activateWhen activated, your terminal usually shows something like:
(venv)This indicates that you are now working inside the virtual environment.
9. Installing Django
Once the virtual environment is active, install Django using pip:
pip install djangoThis downloads and installs Django inside the virtual environment.
Check the installed version
django-admin --versionYou should see the installed Django version number.
10. Creating Your First Django Project
Now that Django is installed, you can create your first project.
Run:
django-admin startproject config .This creates a new Django project in the current folder.
Why use the dot . at the end?
The dot tells Django to create the project in the current directory instead of creating an extra nested folder.
If you prefer, you can also write:
django-admin startproject configThis creates a separate folder named config.
11. Understanding the Created Files
After creating the project, you will see files like these:
manage.py
config/
Inside the config folder, you will usually find:
__init__.pysettings.pyurls.pyasgi.pywsgi.py
manage.py
This is the main command-line utility for interacting with your Django project.
settings.py
This contains the project configuration, such as installed apps, database settings, language, timezone, and static files settings.
urls.py
This defines the main URL routes of the project.
wsgi.py and asgi.py
These are used for deployment and server communication.
12. Running the Development Server
To start the local Django server, run:
python manage.py runserverOn some systems:
python3 manage.py runserveYou will see output similar to:
Watching for file changes with StatReloader
Performing system checks...

System check identified no issues (0 silenced).
April 02, 2026 - 10:00:00
Django version 5.x, using settings 'config.settings'
Starting development server at http://127.0.0.1:8000/
Quit the server with CONTROL-C.
Now open your browser and visit:
http://127.0.0.1:8000/If everything is working, you will see the default Django welcome page.
That page confirms that Django is installed correctly and your project is running.
13. The Default Django Welcome Page
When you see the default Django page, it means:
- Python is working
- Django is installed
- your project was created correctly
- the local server is running
This is a very important milestone for a beginner because it proves the environment is correctly configured.
14. Common Beginner Commands
Here are some useful Django commands you will use often:
Run the server
python manage.py runserverCreate migrations
python manage.py makemigrationsApply migrations
python manage.py migrateCreate an admin user
python manage.py createsuperuserStart a new app
python manage.py startapp myappYou do not need to master all of these now, but it is useful to know they exist.
15. Installing Django with a Specific Version
Sometimes you may want to install a specific Django version for compatibility.
Example:
pip install django==5.0.4This installs exactly that version.
To see installed packages:
pip listTo save project dependencies:
pip freeze > requirements.txtThis creates a requirements.txt file, which is very useful when sharing or deploying your project.
16. Recommended Project Workflow
A good beginner workflow is:
- Create a project folder
- Open it in VS Code
- Create a virtual environment
- Activate it
- Install Django
- Create the Django project
- Run the development server
- Start building apps and features
This workflow is clean and professional.
17. Common Errors and How to Fix Them
Error 1: python is not recognized
This usually means Python is not installed correctly or not added to PATH.
Solution: reinstall Python and make sure PATH is enabled.
Error 2: pip is not recognized
This usually means pip is missing or Python scripts are not in PATH.
Solution: reinstall Python or use python -m pip install django.
Error 3: virtual environment does not activate
Sometimes terminal settings or execution policies block activation.
Solution: make sure you are using the correct activation command for your operating system.
Error 4: No module named django
This usually means Django is not installed in the active environment.
Solution: activate the virtual environment, then run:
pip install djangoError 5: server does not start
This may happen because of syntax errors, missing files, or port issues.
Solution: read the error message carefully and fix the problem step by step.
18. Windows, Linux, and macOS Notes
The main difference between operating systems is usually:
- how Python is called (
pythonvspython3) - how the virtual environment is activated
- some terminal behaviors
But the overall Django workflow is almost the same on all systems.
19. Why This Setup Matters
A proper setup is important because it helps you:
- avoid package conflicts
- keep projects organized
- install the right dependencies
- run Django smoothly
- follow professional development practices
Many beginner problems in Django come from poor environment setup, so learning this correctly from the beginning saves a lot of time later.
20. Summary
In this tutorial, you learned how to prepare a Django development environment from scratch. You saw how to install Python and pip, choose a code editor, create and activate a virtual environment, install Django, create a project, and run the development server.
These steps are the technical foundation for all future Django development. Once your environment is ready, you can begin creating apps, views, templates, and models with confidence.
21. Key Takeaways
- Django requires Python and pip.
- A virtual environment isolates project dependencies.
- Django is installed using
pip install django. - A new project can be created with
django-admin startproject. - The development server runs with
python manage.py runserver. - Seeing the Django welcome page means your setup works.
22. Small Knowledge Check
- Why is a virtual environment important in Django projects?
- Which command installs Django?
- What is the role of
manage.py? - Which file contains the main project settings?
- Which command starts the local server?
23. Conclusion
Your Django environment is now ready. This is the first practical step toward building real web applications with Python. Once installation and setup are complete, the next step is understanding how Django projects are organized internally.










💬 Comments
No comments yet. Be the first to comment!
Login to comment.