0. Introduction
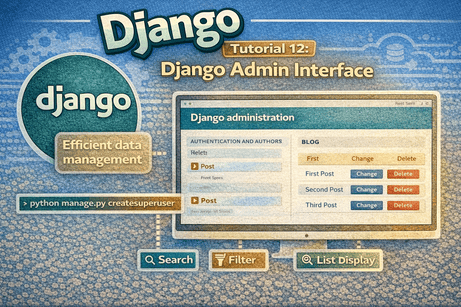
The Django admin interface is one of the framework’s most powerful built-in features. It gives you a ready-made dashboard for managing your application data without building a custom back office from scratch. With just a few steps, you can add, edit, delete, and search records directly from your browser.
In this tutorial, you will learn what the Django admin interface is, why it is useful, how to enable it, how to register models, and how to customize it for a better management experience.
1. What Is the Django Admin Interface?
The Django admin interface is a built-in administration panel automatically provided by Django.
It allows you to manage your project data through a web interface.
Example actions you can do in the admin panel
- create new posts
- edit existing records
- delete items
- manage users
- search data
- filter records
- organize content
Instead of writing custom pages for administration, Django gives you a working dashboard immediately.
2. Why the Admin Interface Is Important
The Django admin interface is useful because it saves a lot of development time.
Benefits
- ready to use
- easy to configure
- no need to create management pages manually
- useful for testing models quickly
- helpful for administrators and content managers
For example, if you build a blog application, you can use the admin panel to create and manage blog posts without touching the database directly.
3. Is the Admin Interface Enabled by Default?
Yes. In a standard Django project, the admin app is already included in INSTALLED_APPS.
In settings.py, you usually have:
INSTALLED_APPS = [
    'django.contrib.admin',
    'django.contrib.auth',
    'django.contrib.contenttypes',
    'django.contrib.sessions',
    'django.contrib.messages',
    'django.contrib.staticfiles',
]
Also, the main project urls.py usually contains:
from django.contrib import admin
from django.urls import path

urlpatterns = [
    path('admin/', admin.site.urls),
]
This means the admin interface is accessible at:
4. Creating a Superuser
To log into the admin panel, you need an administrator account called a superuser.
Run this command in the terminal:
python manage.py createsuperuserDjango will ask for:
- username
- email address
- password
After completing these steps, your superuser account will be created.
Example
Username: admin
Email address: admin@example.com
Password: ********
Password (again): ********
Superuser created successfully.
5. Logging into the Admin Panel
Start the development server:
python manage.py runserverThen open:
You will see the login page.
Enter your superuser username and password, and Django will open the admin dashboard.
6. Why Models Do Not Appear Automatically
Even if you have created a model, it will not automatically appear in the admin interface.
To make a model visible in the admin panel, you must register it in admin.py.
7. Registering a Model in Admin
Suppose you have this model in blog/models.py:
from django.db import models

class Post(models.Model):
    title = models.CharField(max_length=200)
    content = models.TextField()

    def __str__(self):
        return self.title
To register it, open blog/admin.py and add:
from django.contrib import admin
from .models import Post

admin.site.register(Post)
Now the Post model will appear in the admin panel.
8. Managing Data Through the Admin
Once a model is registered, you can:
- click the model name
- see the list of existing records
- add new records
- edit records
- delete records
For example, with the Post model, you can create blog posts directly from the admin page.
This makes the admin interface very useful during development and for content management.
9. The Role of __str__() in Admin
When records appear in the admin list, Django needs a readable label for each one.
If you do not define __str__(), Django may display something unclear like:
Post object (1)
Post object (2)
That is why it is recommended to add:
def __str__(self):
    return self.title
Then the admin panel will show the actual post title instead.
10. Customizing Admin Display with ModelAdmin
You can improve how a model appears in the admin panel using a ModelAdmin class.
Example
from django.contrib import admin
from .models import Post

class PostAdmin(admin.ModelAdmin):
    list_display = ('id', 'title')

admin.site.register(Post, PostAdmin)
What this does
It shows the id and title columns in the list page of the admin panel.
This makes the interface more informative.
11. Using list_display
list_display controls which fields are visible in the admin list view.
Example
class PostAdmin(admin.ModelAdmin):
    list_display = ('id', 'title', 'created_at', 'is_published')
This is useful when your model has many important fields and you want quick visibility.
12. Using search_fields
You can enable search inside the admin panel.
Example
class PostAdmin(admin.ModelAdmin):
    list_display = ('id', 'title')
    search_fields = ('title',)
This adds a search box that allows you to search posts by title.
Very useful when your database grows.
13. Using list_filter
You can add filters in the sidebar of the admin interface.
Example
class PostAdmin(admin.ModelAdmin):
    list_display = ('id', 'title', 'is_published')
    list_filter = ('is_published',)
This lets you filter posts by publication status.
14. Using ordering
You can control the default order of records in the admin panel.
Example
class PostAdmin(admin.ModelAdmin):
    ordering = ('-id',)
This displays the newest records first.
15. Example of a More Complete Admin Configuration
from django.contrib import admin
from .models import Post

class PostAdmin(admin.ModelAdmin):
    list_display = ('id', 'title', 'is_published', 'created_at')
    search_fields = ('title', 'content')
    list_filter = ('is_published', 'created_at')
    ordering = ('-created_at',)

admin.site.register(Post, PostAdmin)
This creates a much more practical admin interface.
16. Admin Interface for Multiple Models
You can register several models in the same admin.py file.
Example
from django.contrib import admin
from .models import Post, Category

admin.site.register(Post)
admin.site.register(Category)
Each registered model appears as a separate section in the admin dashboard.
17. Unregistering a Model
In some cases, you may want to remove a model from the admin panel.
This is less common for beginners, but it is possible using:
admin.site.unregister(ModelName)This is useful if a model should not be managed through admin.
18. Admin Site Header Customization
You can change the default admin site titles to match your project.
Example
admin.site.site_header = "My Blog Administration"
admin.site.site_title = "My Blog Admin"
admin.site.index_title = "Welcome to the Admin Panel"
This makes the admin area feel more personalized.
19. Common Beginner Mistakes
Mistake 1: Forgetting to create a superuser
Without a superuser, you cannot log in.
Mistake 2: Forgetting to register the model
If the model is not registered in admin.py, it will not appear.
Mistake 3: Not defining __str__()
This makes the admin display less readable.
Mistake 4: Expecting admin to replace the whole frontend
The admin panel is mainly for internal management, not for public user pages.
Mistake 5: Forgetting migrations
If your model changes are not migrated, admin may not work correctly with the database.
20. Best Practices
- always define
__str__()in your models - register only useful models
- use
list_displayfor important fields - add
search_fieldswhen records may grow - use filters for easier navigation
- keep the admin interface clean and practical
The admin interface should help you manage content quickly, not overwhelm you.
21. Real Example: Blog Admin Setup
models.py
from django.db import models

class Post(models.Model):
    title = models.CharField(max_length=200)
    content = models.TextField()
    is_published = models.BooleanField(default=True)
    created_at = models.DateTimeField(auto_now_add=True)

    def __str__(self):
        return self.title
admin.py
from django.contrib import admin
from .models import Post

class PostAdmin(admin.ModelAdmin):
    list_display = ('id', 'title', 'is_published', 'created_at')
    search_fields = ('title',)
    list_filter = ('is_published',)
    ordering = ('-created_at',)

admin.site.register(Post, PostAdmin)
Result
In the admin panel, you can:
- view post titles
- search posts
- filter by published status
- see newest posts first
22. Beginner Analogy
Think of the Django admin panel as the control room of your website.
- the frontend is what visitors see
- the admin panel is where managers control the content behind the scenes
It is like the staff area of a store, not the public shopping area.
23. Summary
In this tutorial, you learned what the Django admin interface is and why it is one of Django’s most useful built-in tools. You saw how to create a superuser, access the admin panel, register models, and improve the management experience using ModelAdmin, list_display, search_fields, list_filter, and ordering.
The admin interface is extremely helpful for managing data, testing models, and building practical dashboards quickly.
24. Key Takeaways
- Django includes a built-in admin interface
- it is accessible through
/admin/ - you need a superuser to log in
- models must be registered in
admin.py __str__()improves readabilityModelAdminallows customizationlist_display,search_fields, andlist_filtermake admin more useful
25. Small Knowledge Check
- What is the Django admin interface used for?
- Which command creates a superuser?
- Why must a model be registered in
admin.py? - What is the purpose of
__str__()in admin? - What does
list_displaydo?
26. Conclusion
The Django admin interface is one of the reasons Django is so productive. It gives you a working management system almost instantly, which is extremely valuable for developers, administrators, and content managers.










💬 Comments
No comments yet. Be the first to comment!
Login to comment.