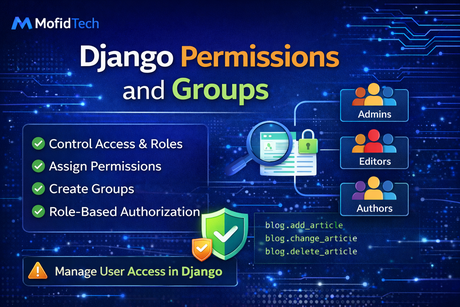
Django permissions and groups are one of the most important parts of building secure, organized, and professional applications. At the beginning, many Django developers only think about one question: is the user logged in or not? That is a useful first step, and Django makes it easy with tools like login_required and LoginRequiredMixin. But real-world applications quickly need more than that. A school platform may have students, teachers, and administrators. A blog may have readers, authors, editors, and superusers. An e-commerce application may have customers, managers, support agents, and warehouse staff. In all of these systems, being authenticated is not enough. The application must also decide what each user is allowed to do. That is where permissions and groups become essential.
The purpose of Django’s permission system is to give you a structured way to control access to actions and resources. Instead of writing random if statements everywhere, Django provides a built-in model-based permission framework. Each model can have permissions like add, change, delete, and view. These permissions can be assigned directly to users or indirectly through groups. A group represents a role, such as “Editors” or “Teachers,” and any user in that group inherits its permissions. This makes your access-control system more maintainable, more readable, and easier to grow over time.
To understand this topic well, it is helpful to separate three related concepts: authentication, authorization, and roles. Authentication means proving who the user is, usually by logging in. Authorization means deciding what that user is allowed to do. Roles are a convenient way to organize authorization by grouping users with similar responsibilities. Django authentication answers the question “Who are you?” Permissions and groups answer the question “What can you do?”
Let us start with a simple example model:
from django.db import models
from django.contrib.auth.models import User

class Article(models.Model):
    title = models.CharField(max_length=200)
    content = models.TextField()
    author = models.ForeignKey(User, on_delete=models.CASCADE)
    published = models.BooleanField(default=False)

    def __str__(self):
        return self.title
When you create this model and run migrations, Django automatically creates a set of default permissions for it. In modern Django versions, these are usually:
add_articlechange_articledelete_articleview_article
These permissions are tied to the model and stored in the database. They belong to Django’s built-in auth system, and they can be managed through the admin interface or through code.
You can see this clearly in the Django admin if you inspect a user or group. Django lists permissions in the format:
blog | article | Can add article
blog | article | Can change article
blog | article | Can delete article
blog | article | Can view article
This is one of the strengths of Django’s permission framework: you get a useful starting structure automatically.
Now let us discuss how to check permissions in code. Django attaches the logged-in user to request.user, and that user object has methods such as has_perm() and has_perms(). For example:
if request.user.has_perm("blog.add_article"):
    print("User can create articles")
The permission string follows the pattern:
app_label.permission_codenameSo for the Article model in the blog app, add_article becomes blog.add_article.
You can check multiple permissions too:
if request.user.has_perms(["blog.add_article", "blog.change_article"]):
    print("User can create and edit articles")
This is very useful in views, services, and other access-control logic.
Now let us use that in a real view:
from django.http import HttpResponseForbidden
from django.shortcuts import render

def create_article(request):
    if not request.user.has_perm("blog.add_article"):
        return HttpResponseForbidden("You do not have permission to create articles.")

    return render(request, "blog/create_article.html")
This works, but Django also provides cleaner tools so that access control does not become repetitive. One of them is the permission_required decorator:
from django.contrib.auth.decorators import permission_required

@permission_required("blog.add_article", raise_exception=True)
def create_article(request):
    return render(request, "blog/create_article.html")
This decorator checks the permission automatically. If the user does not have it, Django can either redirect to the login page or raise a 403 error depending on the settings and arguments. This is often much cleaner than writing the same if not has_perm() code in every view.
For class-based views, Django provides PermissionRequiredMixin:
from django.contrib.auth.mixins import PermissionRequiredMixin
from django.views.generic import CreateView
from .models import Article

class ArticleCreateView(PermissionRequiredMixin, CreateView):
    model = Article
    fields = ["title", "content", "published"]
    template_name = "blog/create_article.html"
    permission_required = "blog.add_article"
This is a very clean and professional way to enforce permissions on class-based views. It keeps access control close to the view definition and reduces clutter.
At this point, you may wonder why we need groups if permissions already exist. The answer is maintainability. Imagine you have 20 editors in your application. You could assign add_article, change_article, and view_article directly to each user one by one. But that becomes difficult to manage. If the role changes later, you would need to update every user. A group solves this by acting as a reusable role container. You create a group called “Editors,” assign the relevant permissions once, and then place users inside it.
Here is how to create a group in code:
from django.contrib.auth.models import Group, Permission

editors_group, created = Group.objects.get_or_create(name="Editors")
Then assign permissions to the group:
from django.contrib.contenttypes.models import ContentType
from .models import Article

content_type = ContentType.objects.get_for_model(Article)

add_permission = Permission.objects.get(codename="add_article", content_type=content_type)
change_permission = Permission.objects.get(codename="change_article", content_type=content_type)
view_permission = Permission.objects.get(codename="view_article", content_type=content_type)

editors_group.permissions.add(add_permission, change_permission, view_permission)
Now any user added to the Editors group automatically gets those permissions.
To add a user to the group:
from django.contrib.auth.models import User

user = User.objects.get(username="ahmed")
editors_group.user_set.add(user)
You can also add the group from the user side:
user.groups.add(editors_group)This is one of the most practical patterns in Django access control. Instead of assigning permissions one user at a time, you design a set of groups that reflect your application roles and assign permissions to those groups.
Let us imagine a blog system with these roles:
- Readers: can only view published articles
- Authors: can add and change their own drafts
- Editors: can add, change, and publish articles
- Admins: can manage everything
You could represent this with groups like:
AuthorsEditorsAdmins
Then assign the standard Django permissions plus perhaps some custom workflow logic. This makes the system much easier to reason about.
Now let us talk about custom permissions. The default add/change/delete/view permissions are useful, but real applications often need more specific actions. For example, in a blog system you may want a special permission to publish articles. That is not one of Django’s automatic defaults. You can define it in the model:
class Article(models.Model):
    title = models.CharField(max_length=200)
    content = models.TextField()
    author = models.ForeignKey(User, on_delete=models.CASCADE)
    published = models.BooleanField(default=False)

    class Meta:
        permissions = [
            ("can_publish_article", "Can publish article"),
        ]

    def __str__(self):
        return self.title
After making migrations and migrating, Django creates that extra permission. Then you can check it just like any other:
if request.user.has_perm("blog.can_publish_article"):
    article.published = True
    article.save()
This is a very powerful feature because it lets your permission system reflect real business actions, not just generic CRUD operations.
You can also use the custom permission decorator:
@permission_required("blog.can_publish_article", raise_exception=True)
def publish_article(request, article_id):
    ...
This keeps permission checks clean and explicit.
A very important concept to understand is that Django’s built-in model permissions are global model-level permissions, not object-level permissions. That means if a user has blog.change_article, Django interprets this as “the user can change articles,” not necessarily “the user can change only their own articles.” This distinction matters a lot.
For example, suppose you want authors to edit only their own articles. A plain permission check is not enough:
if request.user.has_perm("blog.change_article"):
    ...
This does not verify ownership. So in real applications, permissions are often combined with business rules. For example:
from django.shortcuts import get_object_or_404
from django.http import HttpResponseForbidden

def edit_article(request, article_id):
    article = get_object_or_404(Article, id=article_id)

    if not request.user.has_perm("blog.change_article"):
        return HttpResponseForbidden("Missing change permission.")

    if article.author != request.user:
        return HttpResponseForbidden("You can only edit your own articles.")

    ...
This is an essential lesson: Django’s default permission system is powerful, but many real applications still need object-level logic on top of it.
Another common pattern is to allow superusers or editors to bypass the ownership restriction:
def edit_article(request, article_id):
    article = get_object_or_404(Article, id=article_id)

    if not request.user.has_perm("blog.change_article"):
        return HttpResponseForbidden("Missing change permission.")

    if article.author != request.user and not request.user.has_perm("blog.can_publish_article"):
        return HttpResponseForbidden("You are not allowed to edit this article.")

    ...
Now authors can edit their own articles, while users with the publishing permission can edit any article. This is a very realistic pattern.
You can also inspect a user’s groups directly. For example:
if request.user.groups.filter(name="Editors").exists():
    print("User is an editor")
This is sometimes useful, but in general it is better to check permissions rather than hardcoding group names everywhere. Permissions describe what the user can do, while group names describe how permissions are organized. If your code depends too heavily on literal group names, it becomes less flexible. A better pattern is often:
- use groups to manage permissions,
- use permissions in business logic.
For example, this is stronger:
if request.user.has_perm("blog.can_publish_article"):
    ...
than:
if request.user.groups.filter(name="Editors").exists():
    ...
because permissions focus on capability rather than the label of the role.
That said, sometimes group names do matter for workflow, UI, or reporting. For example, you may want to show a different dashboard to teachers and students. In such cases, checking group membership can be appropriate, but you should do it intentionally.
Another useful method is:
request.user.get_all_permissions()This returns a set of all permission strings the user has, including those inherited from groups. For example:
permissions = request.user.get_all_permissions()
print(permissions)
This can help with debugging or administrative logic.
Django also provides convenient flags on the user model:
is_authenticatedis_staffis_superuser
These are related to access control but not the same as model permissions. It is very important to understand the distinction.
is_authenticated means the user is logged in.
is_staff usually means the user can access the Django admin site, assuming other conditions are met.
is_superuser means the user automatically has all permissions.
This means a superuser passes permission checks even if no explicit permission was assigned. For example:
if request.user.has_perm("blog.delete_article"):
    print("Allowed")
A superuser will return True here. This is convenient but also a reason to use superuser accounts sparingly.
Groups and permissions are managed very conveniently in Django admin. You can:
- create groups,
- assign permissions to groups,
- assign groups to users,
- assign permissions directly to users.
This makes admin a powerful place for managing roles without writing custom interfaces. In many projects, creating groups like “Editors,” “Managers,” or “Teachers” in admin is one of the first steps in designing an access-control system.
Let us build a complete example. Suppose you have a publishing workflow with articles. You want:
- Authors can add and view articles
- Editors can add, change, view, and publish
- Admins can do everything
First define the custom permission:
class Article(models.Model):
    title = models.CharField(max_length=200)
    content = models.TextField()
    author = models.ForeignKey(User, on_delete=models.CASCADE)
    published = models.BooleanField(default=False)

    class Meta:
        permissions = [
            ("can_publish_article", "Can publish article"),
        ]
Then create groups:
from django.contrib.auth.models import Group, Permission
from django.contrib.contenttypes.models import ContentType
from .models import Article

content_type = ContentType.objects.get_for_model(Article)

authors_group, _ = Group.objects.get_or_create(name="Authors")
editors_group, _ = Group.objects.get_or_create(name="Editors")

add_article = Permission.objects.get(codename="add_article", content_type=content_type)
view_article = Permission.objects.get(codename="view_article", content_type=content_type)
change_article = Permission.objects.get(codename="change_article", content_type=content_type)
can_publish = Permission.objects.get(codename="can_publish_article", content_type=content_type)

authors_group.permissions.set([add_article, view_article])
editors_group.permissions.set([add_article, view_article, change_article, can_publish])
Now your role system is much more expressive and maintainable.
Then assign users:
user.groups.add(authors_group)or:
user.groups.add(editors_group)Then in the publish view:
from django.contrib.auth.decorators import permission_required
from django.shortcuts import get_object_or_404, redirect

@permission_required("blog.can_publish_article", raise_exception=True)
def publish_article(request, article_id):
    article = get_object_or_404(Article, id=article_id)
    article.published = True
    article.save()
    return redirect("article_detail", article_id=article.id)
This is very clean. The permission system now supports the workflow directly.
Permissions can also be used in templates. Django exposes perms in templates, so you can write:
{% if perms.blog.add_article %}
    <a href="{% url 'create_article' %}">Create Article</a>
{% endif %}
Or:
{% if perms.blog.can_publish_article %}
    <a href="{% url 'publish_article' article.id %}">Publish</a>
{% endif %}
This is useful for hiding buttons or menu links that the user should not see. However, template checks are only for presentation. They do not replace real server-side permission checks in views. A user could still try to access the URL directly, so the view itself must remain protected.
Another common use case is combining login and permission requirements. For example:
from django.contrib.auth.decorators import login_required, permission_required

@login_required
@permission_required("blog.add_article", raise_exception=True)
def create_article(request):
    ...
In many cases permission_required already assumes an authenticated user path, but combining these explicitly can improve clarity depending on your design.
For class-based views, you can combine mixins:
from django.contrib.auth.mixins import LoginRequiredMixin, PermissionRequiredMixin
from django.views.generic import UpdateView
from .models import Article

class ArticleUpdateView(LoginRequiredMixin, PermissionRequiredMixin, UpdateView):
    model = Article
    fields = ["title", "content"]
    template_name = "blog/edit_article.html"
    permission_required = "blog.change_article"
This is a common and clean professional pattern.
One thing to be careful about is assigning permissions directly to individual users too often. Django allows it, and sometimes it is appropriate, but if you do it everywhere, the system becomes harder to understand. Groups are usually better for role-based access because they centralize permission management. Direct user permissions are best for special exceptions or very specific individual cases.
Testing permissions is also very important. Access control bugs are some of the most serious bugs in web applications because they can expose or modify data improperly. Good tests should verify both allowed and denied cases. For example:
from django.test import TestCase
from django.contrib.auth.models import User, Permission
from django.urls import reverse

class ArticlePermissionTests(TestCase):
    def setUp(self):
        self.user = User.objects.create_user(username="author", password="test12345")

    def test_user_without_permission_cannot_create_article(self):
        self.client.login(username="author", password="test12345")
        response = self.client.get(reverse("create_article"))
        self.assertIn(response.status_code, [302, 403])
And then a test with the permission assigned:
    def test_user_with_permission_can_create_article(self):
        permission = Permission.objects.get(codename="add_article")
        self.user.user_permissions.add(permission)

        self.client.login(username="author", password="test12345")
        response = self.client.get(reverse("create_article"))
        self.assertEqual(response.status_code, 200)
These tests make sure your permission system behaves the way you expect.
Now let us discuss the limits of Django’s built-in permission system. It is very strong for model-level permissions and role grouping, but it does not natively provide full object-level permissions out of the box. If your application needs very fine-grained rules like:
- user A can edit article 5 but not article 6,
- teacher X can see only students in class Y,
- customer can only access their own invoices,
then you often combine Django permissions with explicit business logic checks or use a dedicated object-permission approach. For many applications, explicit ownership checks plus Django model permissions are enough. The key is to understand what problem you are solving and not assume that change_article automatically means “change only your own articles.”
Another best practice is to think of permissions as part of your domain design, not just a technical afterthought. Before building many views, ask:
- What roles exist in this application?
- What actions should each role be able to perform?
- Which permissions are generic CRUD actions?
- Which permissions are business-specific, like publish, approve, refund, or archive?
- Where do I need object-level ownership checks?
Answering these questions early makes your application architecture much cleaner.
In conclusion, Django permissions and groups provide a powerful built-in framework for controlling what users can do in your application. Permissions define capabilities such as add, change, delete, view, or custom actions like publish. Groups organize those permissions into reusable roles such as Editors, Teachers, or Managers. Together, they let you move from simple “logged in or not” logic to a much more professional authorization system. The most important lessons are to distinguish authentication from authorization, prefer groups over excessive per-user assignment, use permissions in views and templates appropriately, add custom permissions when business actions require them, and remember that model permissions do not automatically solve object-level access control. Once you master permissions and groups, your Django applications become much more secure, organized, and scalable.
What you learned in this tutorial
In this tutorial, you learned what Django permissions and groups are, how Django automatically creates model permissions, how to check permissions with has_perm(), how to protect views with permission_required and PermissionRequiredMixin, how to create and assign groups, how to add custom permissions in Meta, how to use permissions in templates, why groups improve role management, why direct user permissions should be used carefully, and why object-level access often still needs explicit business logic.










💬 Comments
No comments yet. Be the first to comment!
Login to comment.