0. Introduction
User profiles are one of the most common and important features in any Django application. While Django provides a built-in authentication system with a user model, most real-world applications require additional information about users—such as profile pictures, bios, phone numbers, preferences, or social data. Instead of modifying the user model every time, Django developers often use a profile model to extend user information in a clean and scalable way.
This tutorial explains user profiles in Django with a deep understanding. You will learn not only how to implement them, but also why they exist, when to use them, how they interact with authentication, and how to design them in a professional and scalable architecture.
1. What Is a User Profile in Django?
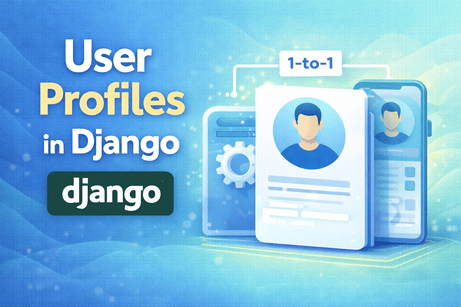
A user profile is a separate model that stores additional information about a user, linked to the main user model using a One-to-One relationship.
Think of it like this:
- The User model handles authentication (login, password, permissions)
- The Profile model handles extra user-related data (bio, image, preferences)
This separation is intentional and follows good design principles.
2. Why Use a Profile Instead of Modifying the User Model?
There are two ways to extend user data:
Option 1: Add fields directly to a custom user model
Option 2: Create a separate profile model
A profile model is often preferred when:
- You already use Django’s default user model
- You want to keep authentication logic clean
- You want modular and flexible design
- You want optional or expandable user data
Key idea:
👉 The user model = identity
👉 The profile model = personal information
This separation makes your project easier to maintain and scale.
3. When Should You Use Profiles?
Use profiles when:
- You need additional user data (bio, avatar, etc.)
- You want to separate concerns (auth vs content)
- You want to avoid modifying the user model
- You want flexible extensions later
Do NOT use profiles if:
- You already designed a custom user model with all needed fields
- The extra fields are core to authentication (e.g., login with phone)
4. Creating the Profile Model
Let’s build a basic profile system.
models.py
from django.db import models
from django.conf import settings

class Profile(models.Model):
    user = models.OneToOneField(
        settings.AUTH_USER_MODEL,
        on_delete=models.CASCADE
    )
    bio = models.TextField(blank=True)
    profile_picture = models.ImageField(upload_to='profiles/', blank=True, null=True)
    phone = models.CharField(max_length=20, blank=True)
    website = models.URLField(blank=True)

    def __str__(self):
        return f"{self.user.username}'s Profile"
5. Deep Explanation of the Profile Model
OneToOneField
user = models.OneToOneField(...)This is the most important part.
It means:
- One user → one profile
- One profile → one user
This ensures each user has exactly one profile.
Why not ForeignKey?
Because ForeignKey allows multiple profiles per user, which is not what we want.
Why not ManyToMany?
Because a profile belongs to exactly one user.
6. Why Use settings.AUTH_USER_MODEL
settings.AUTH_USER_MODELThis is very important.
It ensures compatibility with:
- default user model
- custom user model
If you hardcode
from django.contrib.auth.models import Useryour code becomes less flexible.
Using AUTH_USER_MODEL makes your project future-proof.
7. Run Migrations
python manage.py makemigrations
python manage.py migrate
Now your profile table exists in the database.
8. Automatically Creating Profiles with Signals
You don’t want to manually create a profile every time a user is created.
Instead, use Django Signals.
signals.py
from django.db.models.signals import post_save
from django.dispatch import receiver
from django.conf import settings
from .models import Profile

@receiver(post_save, sender=settings.AUTH_USER_MODEL)
def create_user_profile(sender, instance, created, **kwargs):
    if created:
        Profile.objects.create(user=instance)
9. Why This Signal Is Important
This signal ensures:
👉 Every user automatically gets a profile
👉 No missing profiles
👉 Works everywhere (admin, forms, scripts)
Without it, you would risk inconsistencies.
10. Register the Signal
In apps.py:
from django.apps import AppConfig

class AccountsConfig(AppConfig):
    name = 'accounts'

    def ready(self):
        import accounts.signals
11. Accessing the Profile
Once created, you can access the profile easily.
user.profileExample:
request.user.profile.bioThis works because Django automatically creates a reverse relationship.
12. Creating Profile Views
Now let’s display a user profile.
views.py
from django.shortcuts import render

def profile_view(request):
    profile = request.user.profile
    return render(request, 'accounts/profile.html', {'profile': profile})
13. Template Example
profile.html
<h1>{{ profile.user.username }}</h1>

<p>{{ profile.bio }}</p>

{% if profile.profile_picture %}
    <img src="{{ profile.profile_picture.url }}" width="150">
{% endif %}

<p>Phone: {{ profile.phone }}</p>
<p>Website: {{ profile.website }}</p>
14. Editing the Profile
You also need a form to update profile data.
forms.py
from django import forms
from .models import Profile

class ProfileForm(forms.ModelForm):
    class Meta:
        model = Profile
        fields = ['bio', 'profile_picture', 'phone', 'website']
15. Update View
from django.shortcuts import render, redirect
from .forms import ProfileForm

def edit_profile(request):
    profile = request.user.profile

    if request.method == 'POST':
        form = ProfileForm(request.POST, request.FILES, instance=profile)
        if form.is_valid():
            form.save()
            return redirect('profile')
    else:
        form = ProfileForm(instance=profile)

    return render(request, 'accounts/edit_profile.html', {'form': form})
16. Why request.FILES Is Important
For image uploads:
request.FILESWithout it, uploaded images won’t be processed.
17. Handling Media Files
In settings.py:
MEDIA_URL = '/media/'
MEDIA_ROOT = os.path.join(BASE_DIR, 'media')
In urls.py (development only):
from django.conf import settings
from django.conf.urls.static import static

urlpatterns += static(settings.MEDIA_URL, document_root=settings.MEDIA_ROOT)
18. Improving the UX
Good profile pages should:
- show user info clearly
- allow editing easily
- display profile image nicely
- handle missing data gracefully
Example:
{% if profile.bio %}
    <p>{{ profile.bio }}</p>
{% else %}
    <p>No bio yet.</p>
{% endif %}
19. Profile + User Combined Forms
Sometimes you want to edit user + profile together.
Example:
class UserForm(forms.ModelForm):
    class Meta:
        model = get_user_model()
        fields = ['username', 'email']
Then combine both forms in one view.
20. Real-World Profile Features
Profiles can include:
- avatar image
- social links
- notifications preferences
- privacy settings
- roles (student, teacher, admin)
- activity stats
- badges or achievements
Profiles are often the center of user personalization.
21. Performance Consideration
Accessing user.profile triggers a database query.
To optimize:
User.objects.select_related('profile')This avoids extra queries.
22. Security Considerations
Always ensure:
- users can only edit their own profile
- file uploads are validated
- sensitive data is protected
Example:
if request.user != profile.user:
    return HttpResponseForbidden()
23. Common Beginner Mistakes
❌ Forgetting signals → profiles not created
❌ Using ForeignKey instead of OneToOne
❌ Not handling media files
❌ Hardcoding User model
❌ Allowing users to edit others’ profiles
❌ Not validating uploaded images
24. Profile vs Custom User Model (Important Comparison)
| Feature | Profile Model | Custom User Model |
|---|---|---|
| Easy to implement | ✅ | ❌ |
| Flexible | ✅ | ✅ |
| Modify auth behavior | ❌ | ✅ |
| Best for extra fields | ✅ | ❌ |
| Best for login changes | ❌ | ✅ |
👉 Use both together in many real projects.
25. Clean Architecture Pattern
A professional structure:
accounts/
    models.py   → CustomUser + Profile
    signals.py  → auto-create profile
    forms.py    → ProfileForm
    views.py    → profile views
    templates/  → UI
26. Full Example Flow
- User registers
- Django creates User
- Signal creates Profile
- User logs in
- Profile page loads
- User edits profile
- Data saved
This is a complete real-world lifecycle.
27. What You Learned
You learned:
- what a profile is and why it exists
- how to create a OneToOne relationship
- how to auto-create profiles using signals
- how to display and edit profile data
- how profiles integrate with authentication
- best practices and architecture
28. Conclusion
User profiles are one of the most important building blocks in Django applications. They allow you to extend user data in a clean, scalable, and modular way without interfering with authentication logic. By separating identity from personal data, you create a flexible architecture that can evolve with your project.
In real-world applications, profiles often become a central feature where personalization, user data, and application logic meet. Understanding how to design and manage them correctly is a key step toward building professional Django applications.











💬 Comments
No comments yet. Be the first to comment!
Login to comment.