0. Introduction
A contact form is one of the most useful features you can add to a Django website. It looks simple on the surface, but it teaches many essential Django concepts at once: forms, validation, views, templates, CSRF protection, messages, and sometimes email sending. In a real project, a contact form is not only a way for visitors to reach you, but also a good exercise to understand how Django handles user input safely and cleanly.
In this tutorial, we will build a complete contact form in Django with a deep explanation of each part. We will start with a basic version that receives the user’s name, email, subject, and message. Then we will validate the data, display errors correctly, save success messages, and optionally send the form content by email. The goal is not only to make the form work, but also to understand why Django does things in a certain way and why using Django forms is much better than processing raw HTML inputs manually.
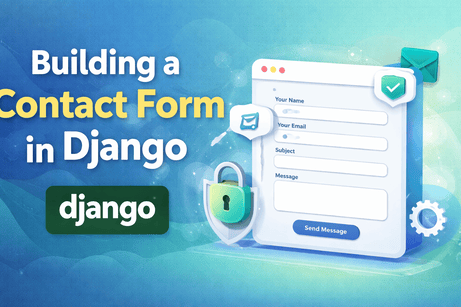
1. What We Will Build
By the end of this tutorial, your contact page will allow a visitor to:
- enter their name
- enter their email address
- write a subject
- write a message
- submit the form safely
- see validation errors if something is wrong
- see a success message when the form is sent
- optionally trigger an email to the site owner
This is a common real-world feature used in portfolios, blogs, business websites, service sites, educational platforms, and SaaS dashboards.
2. Why Use Django Forms Instead of Plain HTML Only?
Before we start coding, it is important to understand one big idea: a form has two sides.
The first side is the frontend. This is what the user sees in the browser: text inputs, labels, placeholders, buttons, and error messages.
The second side is the backend. This is where Django receives the submitted data, checks whether it is valid, cleans it, protects against certain attacks, and decides what to do with it.
Many beginners start by writing only HTML inputs like this:
<input type="text" name="name">
<input type="email" name="email">
<textarea name="message"></textarea>
This works visually, but by itself it does not validate data properly on the server. A malicious or careless user can still submit empty values, invalid emails, or unexpected data. Django forms solve this by giving you a structured, secure, and reusable way to define expected inputs in Python. That means your application logic becomes cleaner, safer, and easier to maintain.
So when we create a contact form in Django, we are not just designing inputs. We are defining a contract between the browser and the server.
3. Project Context
Let us assume you already have a Django project. If not, create one first.
Create project
django-admin startproject mysite
cd mysite
python manage.py startapp contact
Now register the app in settings.py.
INSTALLED_APPS = [
    'django.contrib.admin',
    'django.contrib.auth',
    'django.contrib.contenttypes',
    'django.contrib.sessions',
    'django.contrib.messages',
    'django.contrib.staticfiles',
    'contact',
]
The django.contrib.messages app is already present by default in most Django projects, and it will be useful for showing success feedback to the user.
4. Create the Contact Form
Inside your contact app, create a file called forms.py.
contact/forms.py
from django import forms

class ContactForm(forms.Form):
    name = forms.CharField(
        max_length=100,
        label="Your Name",
        widget=forms.TextInput(attrs={
            'class': 'form-control',
            'placeholder': 'Enter your full name'
        })
    )

    email = forms.EmailField(
        label="Your Email",
        widget=forms.EmailInput(attrs={
            'class': 'form-control',
            'placeholder': 'Enter your email address'
        })
    )

    subject = forms.CharField(
        max_length=150,
        label="Subject",
        widget=forms.TextInput(attrs={
            'class': 'form-control',
            'placeholder': 'Enter the subject'
        })
    )

    message = forms.CharField(
        label="Message",
        widget=forms.Textarea(attrs={
            'class': 'form-control',
            'placeholder': 'Write your message here',
            'rows': 6
        })
    )
5. Deep Explanation of forms.py
This file is the heart of the contact form.
We created a class called ContactForm that inherits from forms.Form. This means the form is not directly tied to a database model. That makes sense here because a contact form often just collects information temporarily and sends it by email rather than storing it in a database.
Each field in the class represents one expected input from the user.
name = forms.CharField(...)
A CharField is used for short text input. We use it for the name because a visitor’s name is plain text. The max_length=100 prevents names from becoming too long.
The label controls the human-readable name shown in the template if you render the field label.
The widget=forms.TextInput(...) controls how the field is displayed in HTML. We also pass CSS classes and placeholders using attrs.
email = forms.EmailField(...)
This field is very important. An EmailField does more than just display an email input. It validates that the submitted text has the structure of an email address. This is one of the advantages of Django forms: validation rules come built in.
subject = forms.CharField(...)
This works like the name field but is used for the message title.
message = forms.CharField(widget=forms.Textarea(...))
By default, CharField renders as a single-line input. But a message should be multi-line, so we use the Textarea widget.
6. Why Widgets Matter
A beginner often thinks form fields are only about validation, but widgets are equally important because they define how the field appears in the browser.
For example:
TextInputgives a standard text boxEmailInputgives an email fieldTextareagives a larger message area
Widgets also let you add:
- CSS classes
- placeholders
- number of rows
- custom attributes like
id,autocomplete,required
Django separates the concept of data type from visual representation. That is a very powerful idea. The field decides what kind of data is expected, while the widget decides how it looks.
7. Create the View
Now we need a view that will display the form when the page is opened and process it when the user submits it.
contact/views.py
from django.shortcuts import render, redirect
from django.contrib import messages
from .forms import ContactForm

def contact_view(request):
    if request.method == 'POST':
        form = ContactForm(request.POST)
        if form.is_valid():
            name = form.cleaned_data['name']
            email = form.cleaned_data['email']
            subject = form.cleaned_data['subject']
            message = form.cleaned_data['message']

            # For now, just print the data in the console
            print("New Contact Message")
            print("Name:", name)
            print("Email:", email)
            print("Subject:", subject)
            print("Message:", message)

            messages.success(request, "Your message has been sent successfully.")
            return redirect('contact')
    else:
        form = ContactForm()

    return render(request, 'contact/contact.html', {'form': form})
8. Deep Explanation of the View
This view is the most important part of the form workflow.
if request.method == 'POST':
A browser usually opens the page with a GET request. That means the user wants to see the empty form.
When the user clicks submit, the browser sends a POST request. That means the user is sending data to the server.
So we use this condition to separate two situations:
GET→ display the blank formPOST→ process submitted data
form = ContactForm(request.POST)
When the user submits the form, Django stores the submitted values in request.POST. Passing this into ContactForm() creates a bound form, meaning a form attached to submitted user data.
This is important because Django can now validate the input and also re-display the user’s entered values if there are errors.
if form.is_valid():
This is one of the most important lines in Django forms.
Calling is_valid() tells Django to:
- inspect every field
- apply built-in validation rules
- apply custom validation if present
- clean the data
- prepare
cleaned_data
If the form is invalid, Django stores the errors and the template can display them automatically.
If the form is valid, the cleaned and trusted values become available in form.cleaned_data.
form.cleaned_data[...]
This dictionary contains validated data. You should always use cleaned_data after validation instead of taking raw values directly from request.POST.
Why? Because cleaned_data is safer and already processed by Django’s validation system.
messages.success(...)
This adds a success notification that can be shown in the template after redirection.
return redirect('contact')
This is a very good practice. After a successful POST submission, we redirect to the same page instead of rendering مباشرة from the POST branch. This follows the POST-Redirect-GET pattern.
Why is that useful?
Because if the user refreshes the page after submitting, the browser will not re-send the form data. Without redirection, refreshing could duplicate submissions.
9. Create the URL
Now we connect the view to a URL.
contact/urls.py
from django.urls import path
from .views import contact_view

urlpatterns = [
    path('contact/', contact_view, name='contact'),
]
Now include this app’s URLs in the main project URL configuration.
mysite/urls.py
from django.contrib import admin
from django.urls import path, include

urlpatterns = [
    path('admin/', admin.site.urls),
    path('', include('contact.urls')),
]
Now the page will be available at:
/contact/10. Create the Template
Create this file:
contact/templates/contact/contact.html
<!DOCTYPE html>
<html lang="en">
<head>
    <meta charset="UTF-8">
    <meta name="viewport" content="width=device-width, initial-scale=1.0">
    <title>Contact Us</title>
    <style>
        body {
            font-family: Arial, sans-serif;
            max-width: 700px;
            margin: 40px auto;
            padding: 20px;
        }
        .form-group {
            margin-bottom: 16px;
        }
        .form-control {
            width: 100%;
            padding: 10px;
            font-size: 16px;
        }
        .btn {
            background: #0d6efd;
            color: white;
            border: none;
            padding: 10px 16px;
            cursor: pointer;
        }
        .errorlist {
            color: red;
            list-style: none;
            padding: 0;
            margin: 5px 0 0;
        }
        .alert-success {
            background: #d1e7dd;
            color: #0f5132;
            padding: 12px;
            margin-bottom: 20px;
        }
    </style>
</head>
<body>
    <h1>Contact Us</h1>

    {% if messages %}
        {% for message in messages %}
            <div class="alert-success">{{ message }}</div>
        {% endfor %}
    {% endif %}

    <form method="post">
        {% csrf_token %}

        <div class="form-group">
            <label for="{{ form.name.id_for_label }}">{{ form.name.label }}</label>
            {{ form.name }}
            {{ form.name.errors }}
        </div>

        <div class="form-group">
            <label for="{{ form.email.id_for_label }}">{{ form.email.label }}</label>
            {{ form.email }}
            {{ form.email.errors }}
        </div>

        <div class="form-group">
            <label for="{{ form.subject.id_for_label }}">{{ form.subject.label }}</label>
            {{ form.subject }}
            {{ form.subject.errors }}
        </div>

        <div class="form-group">
            <label for="{{ form.message.id_for_label }}">{{ form.message.label }}</label>
            {{ form.message }}
            {{ form.message.errors }}
        </div>

        <button type="submit" class="btn">Send Message</button>
    </form>
</body>
</html>
11. Deep Explanation of the Template
This template is where the user interacts with the form.
{% csrf_token %}
This is mandatory for POST forms in Django. It protects against Cross-Site Request Forgery attacks.
Without it, Django will reject the form submission. More importantly, it prevents attackers from forcing a logged-in user’s browser to submit unwanted requests to your site.
So CSRF protection is not just a technical requirement. It is one of the core security features of Django forms.
{{ form.name }}
This renders the HTML input for the name field.
{{ form.name.errors }}
This displays validation errors related to that field. For example, if the field is empty and required, Django will show an error automatically.
This is one of the beautiful parts of Django forms: error handling is integrated naturally.
Why render field by field?
You could render the whole form with:
{{ form.as_p }}But field-by-field rendering gives much better control over layout, design, spacing, labels, and error placement. For a professional website, this is usually the better approach.
12. Test the Contact Form
Run the server:
python manage.py runserverOpen:
http://127.0.0.1:8000/contact/Try the following tests:
- submit empty form
- enter invalid email
- fill everything correctly
You should see:
- field-specific validation errors for invalid cases
- success message after valid submission
- submitted data printed in the terminal
At this stage, the form already works correctly.
13. Add Custom Validation
Built-in validation is useful, but sometimes you need custom rules. For example, maybe you want to reject very short subjects or messages.
Update forms.py like this:
contact/forms.py
from django import forms

class ContactForm(forms.Form):
    name = forms.CharField(
        max_length=100,
        label="Your Name",
        widget=forms.TextInput(attrs={
            'class': 'form-control',
            'placeholder': 'Enter your full name'
        })
    )

    email = forms.EmailField(
        label="Your Email",
        widget=forms.EmailInput(attrs={
            'class': 'form-control',
            'placeholder': 'Enter your email address'
        })
    )

    subject = forms.CharField(
        max_length=150,
        label="Subject",
        widget=forms.TextInput(attrs={
            'class': 'form-control',
            'placeholder': 'Enter the subject'
        })
    )

    message = forms.CharField(
        label="Message",
        widget=forms.Textarea(attrs={
            'class': 'form-control',
            'placeholder': 'Write your message here',
            'rows': 6
        })
    )

    def clean_subject(self):
        subject = self.cleaned_data['subject']
        if len(subject) < 5:
            raise forms.ValidationError("Subject must be at least 5 characters long.")
        return subject

    def clean_message(self):
        message = self.cleaned_data['message']
        if len(message) < 10:
            raise forms.ValidationError("Message must be at least 10 characters long.")
        return message
14. Deep Explanation of Custom Validation
Methods like clean_subject() and clean_message() are special Django methods. When Django validates the form, it automatically looks for methods named clean_<fieldname>.
That means:
clean_subject()validates thesubjectfieldclean_message()validates themessagefield
Inside these methods, you take the already cleaned value, inspect it, and either:
- return it if valid
- raise
ValidationErrorif invalid
This is a clean way to attach business rules to form fields.
For example, the email field checks email format automatically, but your application may have additional rules such as:
- no disposable emails
- no very short messages
- no spam keywords
- no duplicate subject lines in a short period
Django gives you the structure to add such rules cleanly.
15. Send the Contact Form by Email
Printing the data in the terminal is useful for learning, but a real contact form often sends an email to the site owner.
First, configure email settings in settings.py.
For development with console email backend
EMAIL_BACKEND = 'django.core.mail.backends.console.EmailBackend'
DEFAULT_FROM_EMAIL = 'noreply@example.com'
CONTACT_EMAIL = 'admin@example.com'
This backend does not send real emails. It simply prints the email content in the terminal. It is perfect for testing.
Now update the view.
contact/views.py
from django.shortcuts import render, redirect
from django.contrib import messages
from django.core.mail import send_mail
from django.conf import settings
from .forms import ContactForm

def contact_view(request):
    if request.method == 'POST':
        form = ContactForm(request.POST)
        if form.is_valid():
            name = form.cleaned_data['name']
            email = form.cleaned_data['email']
            subject = form.cleaned_data['subject']
            message = form.cleaned_data['message']

            full_message = f"""
You have received a new contact message.

Name: {name}
Email: {email}
Subject: {subject}

Message:
{message}
"""

            send_mail(
                subject=f"Contact Form: {subject}",
                message=full_message,
                from_email=settings.DEFAULT_FROM_EMAIL,
                recipient_list=[settings.CONTACT_EMAIL],
                fail_silently=False,
            )

            messages.success(request, "Your message has been sent successfully.")
            return redirect('contact')
    else:
        form = ContactForm()

    return render(request, 'contact/contact.html', {'form': form})
16. Deep Explanation of Email Sending
The send_mail() function is Django’s simple built-in way to send email.
It needs:
- a subject
- a message body
- a sender address
- a list of recipients
Here we use settings.DEFAULT_FROM_EMAIL as the sender and settings.CONTACT_EMAIL as the site owner’s receiving address.
The important design idea here is that the visitor’s email is not always used directly as the sender address. In many real hosting environments, using arbitrary user emails as the sender can cause delivery issues or spam rejection. A common better practice is:
- use your own verified site email as
from_email - include the user’s email inside the message body
- optionally use
reply_to=[email]in more advanced email setups
That makes the contact system more reliable.
17. Add reply_to for Better Real-World Email Handling
A more practical version is:
from django.core.mail import EmailMessage

email_message = EmailMessage(
    subject=f"Contact Form: {subject}",
    body=full_message,
    from_email=settings.DEFAULT_FROM_EMAIL,
    to=[settings.CONTACT_EMAIL],
    reply_to=[email],
)
email_message.send(fail_silently=False)
This way, when the site owner clicks “Reply” in their email client, the reply goes directly to the visitor’s email address.
This is much better than pretending the email came directly from the visitor.
18. Improve the User Experience
A good contact form is not just functional. It should also feel professional.
Here are some UX improvements:
Preserve entered values after errors
Django already does this automatically when you pass the bound form back to the template. That means if a user submits invalid data, they do not need to retype everything.
Show clear field errors
We already render {{ form.field.errors }} under each field, which is the correct pattern.
Show non-field errors if needed
If your form has form-wide validation, you can display:
{{ form.non_field_errors }}Add placeholders and proper labels
We already did this in widgets and labels.
Add a success message
We used the messages framework for that.
19. Add Spam Protection Ideas
In a real project, contact forms often attract spam. A professional developer should think about this early.
Common protections include:
- reCAPTCHA
- honeypot fields
- rate limiting
- blocked keyword filters
- IP throttling
- email domain restrictions in special cases
A simple honeypot idea is adding an invisible field that humans will not fill but bots often will. If it contains data, reject the submission.
Example:
bot_field = forms.CharField(required=False, widget=forms.HiddenInput)

def clean_bot_field(self):
    value = self.cleaned_data['bot_field']
    if value:
        raise forms.ValidationError("Spam detected.")
    return value
This is not perfect, but it helps reduce simple bot submissions.
20. Save Contact Messages to the Database (Optional)
Some websites prefer to store messages in the database as well as emailing them. In that case, using forms.Form is not enough. A Model and ModelForm may be better.
Example model:
contact/models.py
from django.db import models

class ContactMessage(models.Model):
    name = models.CharField(max_length=100)
    email = models.EmailField()
    subject = models.CharField(max_length=150)
    message = models.TextField()
    created_at = models.DateTimeField(auto_now_add=True)

    def __str__(self):
        return f"{self.name} - {self.subject}"
Then migrate:
python manage.py makemigrations
python manage.py migrate
In the view, after validation, you could save the message:
from .models import ContactMessage

ContactMessage.objects.create(
    name=name,
    email=email,
    subject=subject,
    message=message
)
This is useful if:
- you want a dashboard of received messages
- you want to search old messages
- you want contact history
- email delivery is not always reliable
21. Common Beginner Mistakes
Mistake 1: Forgetting {% csrf_token %}
This causes the form to fail on POST with a CSRF error.
Mistake 2: Accessing request.POST directly everywhere
It is better to let the form validate and use cleaned_data.
Mistake 3: Not checking form.is_valid()
You should never trust form input before validation.
Mistake 4: Re-rendering success directly after POST without redirect
This can lead to duplicate submissions when the user refreshes.
Mistake 5: Using user email directly as sender without thinking about email server rules
This can break delivery on real servers.
Mistake 6: Showing a form but not displaying errors
Then users do not understand what went wrong.
22. Final Clean Version
Here is a solid version of the main files.
forms.py
from django import forms

class ContactForm(forms.Form):
    name = forms.CharField(
        max_length=100,
        label="Your Name",
        widget=forms.TextInput(attrs={
            'class': 'form-control',
            'placeholder': 'Enter your full name'
        })
    )
    email = forms.EmailField(
        label="Your Email",
        widget=forms.EmailInput(attrs={
            'class': 'form-control',
            'placeholder': 'Enter your email address'
        })
    )
    subject = forms.CharField(
        max_length=150,
        label="Subject",
        widget=forms.TextInput(attrs={
            'class': 'form-control',
            'placeholder': 'Enter the subject'
        })
    )
    message = forms.CharField(
        label="Message",
        widget=forms.Textarea(attrs={
            'class': 'form-control',
            'placeholder': 'Write your message here',
            'rows': 6
        })
    )

    def clean_subject(self):
        subject = self.cleaned_data['subject']
        if len(subject) < 5:
            raise forms.ValidationError("Subject must be at least 5 characters long.")
        return subject

    def clean_message(self):
        message = self.cleaned_data['message']
        if len(message) < 10:
            raise forms.ValidationError("Message must be at least 10 characters long.")
        return message
views.py
from django.shortcuts import render, redirect
from django.contrib import messages
from django.core.mail import EmailMessage
from django.conf import settings
from .forms import ContactForm

def contact_view(request):
    if request.method == 'POST':
        form = ContactForm(request.POST)
        if form.is_valid():
            name = form.cleaned_data['name']
            email = form.cleaned_data['email']
            subject = form.cleaned_data['subject']
            message = form.cleaned_data['message']

            full_message = f"""
You have received a new contact message.

Name: {name}
Email: {email}
Subject: {subject}

Message:
{message}
"""

            email_message = EmailMessage(
                subject=f"Contact Form: {subject}",
                body=full_message,
                from_email=settings.DEFAULT_FROM_EMAIL,
                to=[settings.CONTACT_EMAIL],
                reply_to=[email],
            )
            email_message.send(fail_silently=False)

            messages.success(request, "Your message has been sent successfully.")
            return redirect('contact')
    else:
        form = ContactForm()

    return render(request, 'contact/contact.html', {'form': form})
urls.py
from django.urls import path
from .views import contact_view

urlpatterns = [
    path('contact/', contact_view, name='contact'),
]
23. What You Learned in This Tutorial
In this tutorial, you did much more than create a simple page. You learned how Django handles user input in a professional way. You learned the difference between displaying a form and validating it. You saw how forms.py gives structure to expected data, how views distinguish between GET and POST requests, how is_valid() protects your logic, how cleaned_data gives reliable values, how CSRF tokens protect submissions, how success messages improve user experience, and how sending email turns a basic form into a real communication tool.
This is why the contact form tutorial is so important in Django learning. It combines many core pieces of the framework into one small but realistic feature.
24. Conclusion
A contact form may seem small, but it is one of the best practical Django exercises because it teaches both frontend and backend responsibility. On the frontend, the form must be clear, user-friendly, and well-structured. On the backend, it must validate data, stay secure, handle errors properly, and perform a useful action such as sending an email or storing the message.
Once you understand how to build a contact form properly, you are much better prepared to build registration forms, feedback forms, support request forms, checkout forms, profile edit forms, and many other interactive parts of a Django website. In other words, this tutorial is not only about a contact page. It is about learning the general architecture of safe and reusable form handling in Django.











💬 Comments
No comments yet. Be the first to comment!
Login to comment.