0. Introduction
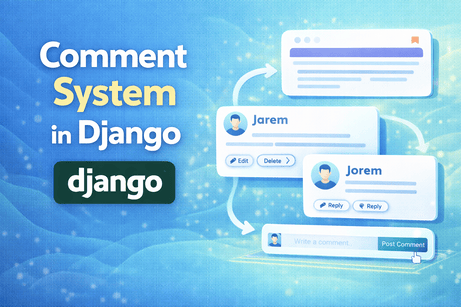
A comment system is one of the most useful features you can add to a Django application. It transforms a static website into an interactive platform where users can react, ask questions, share opinions, and create discussion around your content. In a blog, comments allow readers to respond to articles. In an e-learning platform, students may ask questions below lessons. In a product site, users may leave feedback. In a forum-like project, comments become the core of the whole application.
At first glance, a comment system may look simple: a textarea, a submit button, and a list of existing comments. But when you look deeper, it teaches many of the most important Django concepts at once: model relationships, forms, views, authentication, validation, moderation, timestamps, ordering, template rendering, and security. That is why learning to build a good comment system is such a valuable exercise. It is not just about adding a feature. It is about learning how Django manages user-generated content in a real-world situation.
In this tutorial, we will build a complete Django comment system step by step, with a deep explanation of the architecture behind it. We will start with a simple comment model linked to a blog post, then create forms and views for submitting comments, display comments under each post, protect the system with authentication and basic moderation, and discuss important improvements such as threaded comments, editing, deleting, spam prevention, and performance optimization. The goal is not only to make comments work, but to understand how a professional Django developer thinks about such a feature.
1. What Is a Comment System?
A comment system is a feature that allows users to submit text responses linked to another object in your application. In many cases, the “parent object” is a blog post, an article, a product, or a lesson.
So a comment system is not just a text box. It is a structured relationship between:
- a user
- a content object
- a message
- a timestamp
- optional moderation or status information
For example, if you have a Post model in your blog, a comment system allows many comments to belong to one post. At the same time, each comment may belong to one user.
This means the comment model often sits between content and users, acting as a bridge that stores conversation around your main data.
2. Why a Comment System Is a Great Django Project Feature
A comment system is excellent for learning because it combines many important parts of Django in one practical feature.
It teaches you:
- how models relate to each other
- how a
ForeignKeyworks - how to use forms to receive user input
- how to process POST requests
- how to validate text input
- how to display related objects in templates
- how to use
login_required - how to manage permissions
- how to think about moderation and abuse prevention
In other words, comments are small enough to understand, but rich enough to reflect real-world application design.
3. The Basic Architecture of a Comment System
Before writing code, it helps to understand the main structure conceptually.
A simple comment system usually has:
A content model
For example:
PostArticleLessonProduct
A comment model
This stores:
- the comment text
- the user who wrote it
- the object it belongs to
- the creation date
- optional approval status
A form
This allows users to submit new comments.
A view
This processes comment submission and displays them on the page.
A template
This renders the comment form and the list of comments.
This structure is very common in Django: model → form → view → template.
4. The Simplest Use Case: Comments on Blog Posts
To make the tutorial concrete, let us imagine a blog application with a Post model.
models.py for posts
from django.db import models
from django.conf import settings

class Post(models.Model):
    title = models.CharField(max_length=200)
    slug = models.SlugField(unique=True)
    content = models.TextField()
    author = models.ForeignKey(settings.AUTH_USER_MODEL, on_delete=models.CASCADE)
    created_at = models.DateTimeField(auto_now_add=True)

    def __str__(self):
        return self.title
This is the content that users will comment on.
Now we want to let users write comments below each post.
5. Designing the Comment Model
A good first version of the Comment model could look like this:
models.py for comments
from django.db import models
from django.conf import settings

class Comment(models.Model):
    post = models.ForeignKey(
        Post,
        on_delete=models.CASCADE,
        related_name='comments'
    )
    user = models.ForeignKey(
        settings.AUTH_USER_MODEL,
        on_delete=models.CASCADE,
        related_name='comments'
    )
    content = models.TextField()
    created_at = models.DateTimeField(auto_now_add=True)
    updated_at = models.DateTimeField(auto_now=True)
    is_approved = models.BooleanField(default=True)

    def __str__(self):
        return f"Comment by {self.user} on {self.post}"
6. Deep Explanation of the Comment Model
This model may look small, but every field has an important purpose.
post = models.ForeignKey(Post, ...)
This creates the relationship between a comment and the post it belongs to.
It means:
- one post can have many comments
- each comment belongs to exactly one post
This is the natural structure of a comment system.
related_name='comments'
This lets you access a post’s comments using:
post.comments.all()This is much cleaner than using Django’s default reverse relation name.
user = models.ForeignKey(settings.AUTH_USER_MODEL, ...)
This links each comment to the user who wrote it.
It means:
- one user can write many comments
- each comment belongs to exactly one user
We use settings.AUTH_USER_MODEL instead of importing Django’s default User directly so the project stays compatible with custom user models.
content = models.TextField()
This stores the actual message of the comment.
We use TextField because comments can vary in length and should allow more than a short single-line input.
created_at and updated_at
These fields let us know when the comment was created and last modified.
This is important for:
- showing “posted on” dates
- sorting comments
- moderation history
- showing edited comments later
is_approved = models.BooleanField(default=True)
This field supports moderation.
If you want every comment to be visible immediately, keep default=True.
If you want admin approval before comments appear publicly, you can set the default to False.
This small field can completely change how the system behaves.
7. Why on_delete=models.CASCADE Makes Sense Here
Both post and user use on_delete=models.CASCADE.
This means:
- if a post is deleted, its comments are deleted too
- if a user is deleted, their comments are deleted too
This is usually reasonable, because comments are dependent on their parent objects.
Imagine deleting a blog post but keeping comments that no longer belong anywhere. That would create orphaned data. CASCADE prevents that.
Still, in some projects, you may choose a different strategy, such as preserving anonymous comments after a user is deleted. But for most beginner and intermediate applications, CASCADE is the simplest and cleanest choice.
8. Running Migrations
After creating the model, run:
python manage.py makemigrations
python manage.py migrate
This creates the database table for comments.
This step may feel routine, but it is part of Django’s most important workflow: model definitions in Python become database structure through migrations.
9. Creating a Comment Form
Now that we have the model, users need a way to submit comments. For that, we create a form.
forms.py
from django import forms
from .models import Comment

class CommentForm(forms.ModelForm):
    class Meta:
        model = Comment
        fields = ['content']
        widgets = {
            'content': forms.Textarea(attrs={
                'class': 'form-control',
                'placeholder': 'Write your comment here...',
                'rows': 4,
            }),
        }
        labels = {
            'content': '',
        }
10. Why Use a ModelForm Here
A ModelForm is perfect because the form directly corresponds to the Comment model.
We only expose the content field because:
- the
postshould be assigned automatically in the view - the
usershould come fromrequest.user - timestamps are automatic
- approval status is controlled by the system
This is an important design principle: users should only fill fields they are actually allowed to control.
A good form does not expose internal fields that should be managed by the application.
11. Deep Explanation of the Form Design
Notice that we do not let the user choose:
- which user they are
- which post the comment belongs to
- whether the comment is approved
That is intentional and very important.
If you expose such fields in the form, malicious users could manipulate them.
For example, a bad form design could allow someone to:
- submit a comment pretending to be another user
- attach a comment to the wrong post
- mark their own comment as approved
So the form should include only what the user is allowed to provide: the comment text itself.
12. Creating the Post Detail View
Comments usually appear on the post detail page. So let us build a view that displays both the post and its comments.
views.py
from django.shortcuts import render, get_object_or_404
from .models import Post
from .forms import CommentForm

def post_detail(request, slug):
    post = get_object_or_404(Post, slug=slug)
    comments = post.comments.filter(is_approved=True).order_by('-created_at')
    form = CommentForm()

    context = {
        'post': post,
        'comments': comments,
        'form': form,
    }
    return render(request, 'blog/post_detail.html', context)
13. Deep Explanation of the Detail View
This view does three things:
It fetches the post
post = get_object_or_404(Post, slug=slug)So the page knows which post is being displayed.
It fetches the related comments
comments = post.comments.filter(is_approved=True).order_by('-created_at')This uses the related_name='comments' from the model.
We filter only approved comments and order them from newest to oldest.
It prepares an empty comment form
form = CommentForm()So the template can show a form below the post.
This is a good example of Django views assembling everything a page needs before rendering it.
14. Creating the Comment Submission View
Now users need to submit comments.
views.py
from django.contrib.auth.decorators import login_required
from django.shortcuts import redirect, get_object_or_404
from django.contrib import messages
from .models import Post
from .forms import CommentForm

@login_required
def add_comment(request, slug):
    post = get_object_or_404(Post, slug=slug)

    if request.method == 'POST':
        form = CommentForm(request.POST)
        if form.is_valid():
            comment = form.save(commit=False)
            comment.post = post
            comment.user = request.user
            comment.is_approved = True
            comment.save()

            messages.success(request, 'Your comment has been added.')
        else:
            messages.error(request, 'There was an error with your comment.')

    return redirect('post_detail', slug=post.slug)
15. Why login_required Is Important
A comment system often needs some rule about who can post.
One simple and common rule is: only authenticated users may write comments.
That is why we use:
@login_requiredThis decorator protects the view so anonymous users cannot submit comments.
This has several benefits:
- you know which user wrote the comment
- moderation becomes easier
- spam can be reduced
- users become accountable for their content
Some websites allow anonymous comments, but that usually requires more spam protection and abuse handling.
For many Django projects, authenticated comments are the best starting point.
16. Deep Explanation of form.save(commit=False)
This line is one of the most important in the whole workflow:
comment = form.save(commit=False)Why do we use it?
Because the form only contains content, but the model also requires:
postuser
If we called form.save() immediately, Django would try to save an incomplete comment.
commit=False creates the model instance in memory without saving it to the database yet. That gives us a chance to fill the missing fields:
comment.post = post
comment.user = request.user
Then we save it:
comment.save()This is a very common and powerful Django pattern when some fields are supplied by the application rather than by the user.
17. Why Redirect After Submission
After saving the comment, we redirect back to the post detail page:
return redirect('post_detail', slug=post.slug)This follows the POST-Redirect-GET pattern.
That is important because if we simply rendered the template directly after POST, refreshing the page could re-submit the form and create duplicate comments.
By redirecting, we separate the “submit action” from the “display page.” This makes the system more robust and user-friendly.
<hr>18. Adding URLs
Now connect the views to URLs.
urls.py
from django.urls import path
from .views import post_detail, add_comment

urlpatterns = [
    path('post/<slug:slug>/', post_detail, name='post_detail'),
    path('post/<slug:slug>/comment/', add_comment, name='add_comment'),
]
This gives us:
- one URL for viewing the post and its comments
- one URL for posting a new comment
This separation is clean because it gives each route one responsibility.
19. Building the Template
Now let us show the post, the comment form, and the comment list.
post_detail.html
<h1>{{ post.title }}</h1>
<p>{{ post.content }}</p>

<hr>

<h2>Comments</h2>

{% for comment in comments %}
    <div class="comment-box">
        <p><strong>{{ comment.user.username }}</strong></p>
        <p>{{ comment.content }}</p>
        <small>{{ comment.created_at }}</small>
    </div>
    <hr>
{% empty %}
    <p>No comments yet. Be the first to comment.</p>
{% endfor %}

{% if user.is_authenticated %}
    <h3>Leave a comment</h3>
    <form method="post" action="{% url 'add_comment' post.slug %}">
        {% csrf_token %}
        {{ form.as_p }}
        <button type="submit">Post Comment</button>
    </form>
{% else %}
    <p>You must be logged in to comment.</p>
{% endif %}
20. Deep Explanation of the Template Structure
This template has three major sections.
The post content
At the top, we display the blog post itself.
The existing comments
We loop through the comments queryset and show:
- the author
- the content
- the date
The {% empty %} block is very useful because it handles the case where there are no comments yet.
The comment form
We show the form only if the user is authenticated.
This is an important template-level UX improvement. Even though login_required already protects the submission view, it is still better to avoid showing a form to someone who cannot use it.
This is a good example of combining backend protection with frontend clarity.
21. Adding Basic Styling and Better Markup
A professional comment system should feel clear and readable. A slightly better template version might look like this:
<section class="comments-section">
    <h2>{{ comments.count }} Comment{{ comments.count|pluralize }}</h2>

    {% for comment in comments %}
        <article class="comment-card">
            <header>
                <strong>{{ comment.user.username }}</strong>
                <small>{{ comment.created_at|date:"M d, Y H:i" }}</small>
            </header>
            <p>{{ comment.content|linebreaks }}</p>
        </article>
    {% empty %}
        <p>No comments yet. Start the discussion.</p>
    {% endfor %}
</section>

<section class="comment-form-section">
    {% if user.is_authenticated %}
        <h3>Leave a comment</h3>
        <form method="post" action="{% url 'add_comment' post.slug %}">
            {% csrf_token %}
            {{ form.as_p }}
            <button type="submit">Post Comment</button>
        </form>
    {% else %}
        <p><a href="{% url 'login' %}">Log in</a> to leave a comment.</p>
    {% endif %}
</section>
This makes the interface more user-friendly while still being simple.
22. Adding Validation Rules
Right now, the comment form only uses the default TextField behavior. But in real projects, you may want additional validation.
For example:
- comments should not be empty
- comments should have a minimum length
- comments should not exceed a certain size
- comments should not contain banned words
forms.py
from django import forms
from .models import Comment

class CommentForm(forms.ModelForm):
    class Meta:
        model = Comment
        fields = ['content']

    def clean_content(self):
        content = self.cleaned_data['content'].strip()

        if len(content) < 3:
            raise forms.ValidationError("Comment is too short.")

        if len(content) > 1000:
            raise forms.ValidationError("Comment is too long.")

        return content
23. Why Form Validation Is Better Than Template-Only Checks
A beginner may think it is enough to use HTML attributes like required or maxlength. Those help the user experience, but they are not enough by themselves.
Why?
Because browser-side checks can be bypassed.
Server-side validation in Django forms is the real protection because it ensures the rules are enforced even if a malicious client submits custom data.
This is a general principle in web development:
- client-side validation improves UX
- server-side validation protects data integrity
You should almost always do both when needed.
24. Adding Moderation
Not every comment system should publish comments immediately. In some projects, especially public websites, moderation is important.
We already added this field:
is_approved = models.BooleanField(default=True)If you want moderation before public display, change it to:
is_approved = models.BooleanField(default=False)Then in the submission view:
comment.is_approved = FalseAnd in the detail view, show only approved comments:
comments = post.comments.filter(is_approved=True)This means new comments are stored but not displayed until approved by an admin.
25. Why Moderation Matters
Moderation is not just a technical feature. It is part of content governance.
A public comment system can attract:
- spam
- abuse
- insults
- irrelevant links
- automated bot posts
Moderation gives you a way to protect the quality of discussion and the reputation of your platform.
Whether you need strict moderation depends on the type of project. For a private learning platform, immediate publishing may be fine. For a public blog, moderation may be essential.
26. Registering Comments in Django Admin
If moderation is part of your workflow, Django admin becomes very useful.
admin.py
from django.contrib import admin
from .models import Comment

@admin.register(Comment)
class CommentAdmin(admin.ModelAdmin):
    list_display = ('user', 'post', 'created_at', 'is_approved')
    list_filter = ('is_approved', 'created_at')
    search_fields = ('content', 'user__username', 'post__title')
    list_editable = ('is_approved',)
This gives you a simple moderation dashboard in the admin panel.
You can:
- see all comments
- search them
- filter approved vs unapproved
- approve comments quickly
This is one of the reasons Django admin is so powerful for content-based applications.
27. Allowing Users to Delete Their Own Comments
A more complete system often lets users remove their own comments.
views.py
from django.contrib.auth.decorators import login_required
from django.shortcuts import get_object_or_404, redirect
from django.contrib import messages
from .models import Comment

@login_required
def delete_comment(request, comment_id):
    comment = get_object_or_404(Comment, id=comment_id)

    if request.user != comment.user:
        messages.error(request, "You cannot delete this comment.")
        return redirect('post_detail', slug=comment.post.slug)

    if request.method == 'POST':
        post_slug = comment.post.slug
        comment.delete()
        messages.success(request, "Comment deleted successfully.")
        return redirect('post_detail', slug=post_slug)

    return redirect('post_detail', slug=comment.post.slug)
28. Why Permission Checks Matter
This line is critical:
if request.user != comment.user:Without a check like this, any logged-in user might be able to delete any comment if they know the URL.
So every action that changes user-generated content should consider permissions carefully.
A simple rule is:
- users can edit or delete their own comments
- staff/admin can moderate all comments
This is one of the most important security ideas in content systems.
29. Allowing Users to Edit Their Own Comments
Similarly, users may want to edit their comments.
views.py
@login_required
def edit_comment(request, comment_id):
    comment = get_object_or_404(Comment, id=comment_id)

    if request.user != comment.user:
        messages.error(request, "You cannot edit this comment.")
        return redirect('post_detail', slug=comment.post.slug)

    if request.method == 'POST':
        form = CommentForm(request.POST, instance=comment)
        if form.is_valid():
            form.save()
            messages.success(request, "Comment updated successfully.")
            return redirect('post_detail', slug=comment.post.slug)
    else:
        form = CommentForm(instance=comment)

    return render(request, 'blog/edit_comment.html', {
        'form': form,
        'comment': comment,
    })
This reuses the same form but binds it to the existing comment instance.
30. Should Users Always Be Allowed to Edit Comments?
Not necessarily.
In some systems, unlimited comment editing is fine.
In others, it may create problems such as:
- changing the meaning of old conversations
- hiding abusive content after responses
- confusing discussion flow
Possible rules include:
- allow edits only for 10 minutes
- allow edits but mark the comment as edited
- allow only admins to edit after publication
This shows that even a simple feature like comment editing involves policy choices, not just code.
31. Marking Comments as Edited
If you allow editing, you may want transparency.
For example, you could add:
is_edited = models.BooleanField(default=False)And when a comment is edited:
comment = form.save(commit=False)
comment.is_edited = True
comment.save()
Then in the template:
{% if comment.is_edited %}
    <small>(edited)</small>
{% endif %}
This makes the discussion more honest and understandable for readers.
32. Adding Threaded or Reply Comments
A flat comment list is simple, but many real systems allow replies to comments. This creates a threaded discussion.
To support that, the comment model can reference itself.
models.py
class Comment(models.Model):
    post = models.ForeignKey(Post, on_delete=models.CASCADE, related_name='comments')
    user = models.ForeignKey(settings.AUTH_USER_MODEL, on_delete=models.CASCADE, related_name='comments')
    parent = models.ForeignKey(
        'self',
        null=True,
        blank=True,
        on_delete=models.CASCADE,
        related_name='replies'
    )
    content = models.TextField()
    created_at = models.DateTimeField(auto_now_add=True)
    is_approved = models.BooleanField(default=True)

    def __str__(self):
        return f"Comment by {self.user}"
33. Deep Explanation of Self-Referential Comments
This field is the key:
parent = models.ForeignKey('self', ...)It means a comment can optionally point to another comment as its parent.
So:
- if
parentisNone, the comment is a top-level comment - if
parentis set, the comment is a reply
This design is elegant because it allows the same model to represent both normal comments and replies.
Threaded systems are more complex to render, but they create richer discussions.
34. Rendering Replies in Templates
A simple template idea:
{% for comment in comments %}
    {% if not comment.parent %}
        <div class="comment">
            <p><strong>{{ comment.user.username }}</strong></p>
            <p>{{ comment.content }}</p>

            {% for reply in comment.replies.all %}
                <div class="reply" style="margin-left: 30px;">
                    <p><strong>{{ reply.user.username }}</strong></p>
                    <p>{{ reply.content }}</p>
                </div>
            {% endfor %}
        </div>
    {% endif %}
{% endfor %}
This creates a visible nesting structure.
In more advanced systems, recursive templates may be used to support many levels of replies.
35. Spam Prevention Ideas
A public comment system almost always needs anti-spam thinking.
Some helpful strategies:
- require login
- use rate limiting
- add reCAPTCHA
- block suspicious keywords or repeated links
- use moderation
- limit comment frequency per user or IP
- add honeypot fields
For example, you might prevent a user from posting too many comments too quickly.
This is not just about security. It is also about protecting the usability of the discussion space.
36. Rate Limiting Example Logic
Imagine a simple rule: a user cannot post more than one comment every 30 seconds.
In the view, you could do something like:
from django.utils import timezone
from datetime import timedelta

last_comment = Comment.objects.filter(user=request.user).order_by('-created_at').first()

if last_comment and timezone.now() - last_comment.created_at < timedelta(seconds=30):
    messages.error(request, "Please wait before posting another comment.")
    return redirect('post_detail', slug=post.slug)
This is not the only way to fight spam, but it shows how business rules can be applied before saving a comment.
37. Performance Considerations
A small comment system works fine with basic queries, but as the number of comments grows, performance matters more.
For example:
- loading all comments for a very popular post could become expensive
- showing
comment.user.usernamerepeatedly may trigger unnecessary queries if not optimized - threaded replies can add query complexity
Some common improvements include:
- using
select_related('user') - paginating comments
- prefetching replies
- limiting comment depth
- indexing timestamps if needed
Example:
comments = post.comments.filter(is_approved=True, parent__isnull=True)\
    .select_related('user')\
    .prefetch_related('replies__user')\
    .order_by('-created_at')
This shows how performance and architecture eventually become part of even a “simple” comment feature.
38. Pagination for Comments
If a post has many comments, pagination improves both performance and readability.
Example:
from django.core.paginator import Paginator

comments_list = post.comments.filter(is_approved=True).order_by('-created_at')
paginator = Paginator(comments_list, 10)
page_number = request.GET.get('page')
comments = paginator.get_page(page_number)
Then in the template, you can render comment pages.
This helps keep long discussions manageable.
39. Anonymous Comments vs Authenticated Comments
A major design choice is whether comments should require accounts.
Authenticated comments
Advantages:
- clearer accountability
- easier moderation
- less spam
- richer user identity
Anonymous comments
Advantages:
- lower friction
- easier participation
- no signup barrier
But anonymous systems often need extra complexity, such as:
- guest name/email fields
- captcha
- stronger moderation
- IP logging or anti-abuse systems
For most Django learning projects and many real applications, authenticated comments are the best place to start.
40. Improving User Experience
A good comment system is not just functional. It should feel smooth.
Good UX ideas include:
- preserving the form when validation fails
- showing success/error messages
- showing the number of comments
- clearly separating each comment visually
- showing relative or formatted timestamps
- showing the current user’s avatar if profiles exist
- providing edit/delete buttons only where allowed
These small touches can make the feature feel much more professional.
41. Integrating User Profiles or Avatars
If your project has user profiles, comments become much richer.
Example template:
<div class="comment-header">
    {% if comment.user.profile.profile_picture %}
        <img src="{{ comment.user.profile.profile_picture.url }}" width="40" height="40">
    {% endif %}
    <strong>{{ comment.user.username }}</strong>
</div>
This makes the discussion look more personal and polished.
But this also reminds us that comment systems often connect naturally with other tutorial topics like profiles, custom users, and permissions.
42. Common Beginner Mistakes
Here are some very common mistakes when building a comment system.
Mistake 1: Letting the form expose user or post
These should be assigned in the view, not by user input.
Mistake 2: Forgetting CSRF protection
Every POST form should include:
{% csrf_token %}Mistake 3: Not checking permissions on edit/delete
Users should not be able to change other people’s comments.
Mistake 4: Trusting only browser-side validation
Server-side validation is still necessary.
Mistake 5: Ignoring moderation or spam risks
Public content systems always need abuse thinking.
Mistake 6: Using the default User import directly everywhere
Prefer settings.AUTH_USER_MODEL in models and get_user_model() in Python code.
These mistakes are common because comments seem simple, but they touch many sensitive parts of application design.
43. A Clean Complete Example
Here is a clean minimal version of the core pieces.
models.py
from django.db import models
from django.conf import settings

class Post(models.Model):
    title = models.CharField(max_length=200)
    slug = models.SlugField(unique=True)
    content = models.TextField()

    def __str__(self):
        return self.title


class Comment(models.Model):
    post = models.ForeignKey(Post, on_delete=models.CASCADE, related_name='comments')
    user = models.ForeignKey(settings.AUTH_USER_MODEL, on_delete=models.CASCADE, related_name='comments')
    content = models.TextField()
    created_at = models.DateTimeField(auto_now_add=True)
    is_approved = models.BooleanField(default=True)

    class Meta:
        ordering = ['-created_at']

    def __str__(self):
        return f'Comment by {self.user} on {self.post}'
forms.py
from django import forms
from .models import Comment

class CommentForm(forms.ModelForm):
    class Meta:
        model = Comment
        fields = ['content']
        widgets = {
            'content': forms.Textarea(attrs={
                'rows': 4,
                'placeholder': 'Write your comment here...'
            })
        }

    def clean_content(self):
        content = self.cleaned_data['content'].strip()
        if len(content) < 3:
            raise forms.ValidationError("Comment is too short.")
        return content
views.py
from django.contrib.auth.decorators import login_required
from django.contrib import messages
from django.shortcuts import render, redirect, get_object_or_404
from .models import Post
from .forms import CommentForm

def post_detail(request, slug):
    post = get_object_or_404(Post, slug=slug)
    comments = post.comments.filter(is_approved=True).select_related('user')
    form = CommentForm()

    return render(request, 'blog/post_detail.html', {
        'post': post,
        'comments': comments,
        'form': form,
    })


@login_required
def add_comment(request, slug):
    post = get_object_or_404(Post, slug=slug)

    if request.method == 'POST':
        form = CommentForm(request.POST)
        if form.is_valid():
            comment = form.save(commit=False)
            comment.post = post
            comment.user = request.user
            comment.save()
            messages.success(request, "Comment posted successfully.")
        else:
            messages.error(request, "Please correct the form and try again.")

    return redirect('post_detail', slug=slug)
urls.py
from django.urls import path
from .views import post_detail, add_comment

urlpatterns = [
    path('post/<slug:slug>/', post_detail, name='post_detail'),
    path('post/<slug:slug>/comment/', add_comment, name='add_comment'),
]
This is already a strong foundation for many projects.
44. What You Learned in This Tutorial
In this tutorial, you learned that a comment system in Django is much more than a simple form under a blog post. It is a structured relationship between users, content, and discussion data. You learned how to design a Comment model with proper foreign keys, how to use a ModelForm to safely accept user input, how to display comments in a post detail page, and how to submit them through a protected POST view using authentication and CSRF protection. You also learned why commit=False is important, how moderation can be added with approval fields, how users can edit and delete their own comments, how threaded replies can be modeled with a self-referential foreign key, and why spam prevention, permissions, performance, and user experience all matter in a real-world comment system.
This is exactly why comments are such a valuable Django tutorial topic: they bring together database design, forms, views, templates, security, and application policy in one practical feature.
45. Conclusion
A comment system is one of the most realistic features you can build in Django because it introduces user-generated content, which always requires more thought than static data. It is not enough to simply save text to the database. You must think about relationships, permissions, validation, moderation, abuse, usability, and scalability. That is what makes this feature both challenging and educational.
The best way to build a good comment system is to start simple: create a clean model, a secure form, a protected submission view, and a readable template. Then improve it gradually with moderation, editing, replies, and performance optimization as your project grows. This mirrors real software development: build a solid foundation first, then extend it carefully according to actual needs.











💬 Comments
No comments yet. Be the first to comment!
Login to comment.