Subject
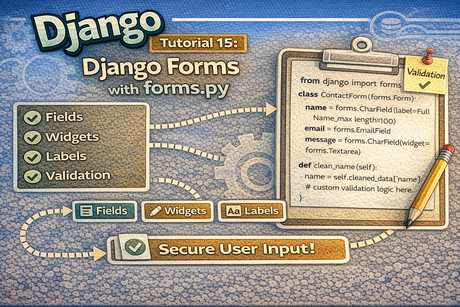
Django forms, widgets, labels, cleaned data, and validation methods.
Django forms are one of the most useful tools for building interactive websites. They help you collect user input, validate it, display errors clearly, and process clean data safely. While ModelForm is very convenient when working with database models, learning how to build forms manually with forms.py is extremely important because it gives you more control and helps you understand how Django forms really work.
In this tutorial, you will learn how to create forms in forms.py, use different field types, customize labels and widgets, access cleaned data, and apply custom validation methods.
1. What Is forms.py?
In Django, forms.py is a file where you define form classes for your app.
For example, inside your app folder:
blog/
├── forms.py
├── views.py
├── models.py
The role of forms.py is to contain form definitions such as:
- contact forms
- search forms
- registration forms
- feedback forms
- custom input forms
This keeps your project organized and separates form logic from views.
2. Why Use Django Forms?
You could write plain HTML forms manually, but Django forms give you many advantages:
- automatic validation
- Python-based form definitions
- reusable form classes
- built-in error handling
- secure data cleaning
- easy rendering in templates
In short, Django forms make forms easier to build and safer to process.
3. Creating Your First Form in forms.py
Create a file named forms.py inside your app.
blog/forms.py
from django import forms

class ContactForm(forms.Form):
    name = forms.CharField(max_length=100)
    email = forms.EmailField()
    message = forms.CharField(widget=forms.Textarea)
Explanation
forms.Formis the base class for regular formsnameis a text fieldemailis an email fieldmessageis a larger textarea field
This form is not connected to a model. It is a manual Django form.
4. Using the Form in a View
Now use the form in views.py.
blog/views.py
from django.shortcuts import render
from .forms import ContactForm

def contact(request):
    form = ContactForm()
    return render(request, 'blog/contact.html', {'form': form})
This creates an empty form and sends it to the template.
5. Displaying the Form in a Template
blog/templates/blog/contact.html
<h1>Contact Us</h1>

<form method="POST">
    {% csrf_token %}
    {{ form.as_p }}
    <button type="submit">Send</button>
</form>
What {{ form.as_p }} does
It displays the form fields wrapped in paragraph tags.
Django also provides:
{{ form.as_table }}{{ form.as_ul }}
But as_p is often the simplest for beginners.
6. Common Form Fields in Django
Django provides many field types.
Example
from django import forms

class ExampleForm(forms.Form):
    name = forms.CharField(max_length=100)
    age = forms.IntegerField()
    email = forms.EmailField()
    birth_date = forms.DateField()
    agree = forms.BooleanField()
Common field types
CharField→ textEmailField→ email addressesIntegerField→ whole numbersFloatField→ decimal numbersDateField→ datesBooleanField→ true/false checkboxChoiceField→ dropdown options
7. Using Labels
By default, Django creates labels from field names. But you can customize them.
Example
from django import forms

class ContactForm(forms.Form):
    name = forms.CharField(label='Your Full Name', max_length=100)
    email = forms.EmailField(label='Email Address')
    message = forms.CharField(label='Your Message', widget=forms.Textarea)
Why use custom labels?
Custom labels make forms more user-friendly and professional.
Instead of:
Name
You can display:
Your Full Name
8. Using Widgets
Widgets control how a form field is rendered in HTML.
For example, a CharField usually becomes an <input type="text">, but you can customize its appearance and attributes with widgets.
Example
from django import forms

class ContactForm(forms.Form):
    name = forms.CharField(
        max_length=100,
        widget=forms.TextInput(attrs={
            'placeholder': 'Enter your name',
            'class': 'form-control'
        })
    )
    email = forms.EmailField(
        widget=forms.EmailInput(attrs={
            'placeholder': 'Enter your email',
            'class': 'form-control'
        })
    )
    message = forms.CharField(
        widget=forms.Textarea(attrs={
            'placeholder': 'Write your message',
            'class': 'form-control',
            'rows': 5
        })
    )
What this changes
- adds placeholders
- adds CSS classes
- changes size and appearance
- improves the user interface
9. Common Widgets
Some common widgets are:
forms.TextInputforms.EmailInputforms.PasswordInputforms.Textareaforms.Selectforms.CheckboxInputforms.DateInput
Example
password = forms.CharField(widget=forms.PasswordInput)This hides the entered password in the browser.
10. Handling Form Submission
Now let us process submitted data.
views.py
from django.shortcuts import render
from .forms import ContactForm

def contact(request):
    if request.method == 'POST':
        form = ContactForm(request.POST)

        if form.is_valid():
            data = form.cleaned_data
            return render(request, 'blog/success.html', {'data': data})
    else:
        form = ContactForm()

    return render(request, 'blog/contact.html', {'form': form})
Explanation
- if request is
POST, Django fills the form with submitted data form.is_valid()checks whether the data is correctform.cleaned_datagives access to validated data- if request is not
POST, an empty form is displayed
11. What Is cleaned_data?
cleaned_data is one of the most important concepts in Django forms.
After validation succeeds, Django stores safe and validated values inside:
form.cleaned_data
Example
if form.is_valid():
    name = form.cleaned_data['name']
    email = form.cleaned_data['email']
    message = form.cleaned_data['message']
Why it matters
You should use cleaned_data, not raw request.POST, when working with validated form input.
12. Example of Showing Submitted Data
success.html
<h1>Form Submitted Successfully</h1>
<p>Name: {{ data.name }}</p>
<p>Email: {{ data.email }}</p>
<p>Message: {{ data.message }}</p>
This is a simple way to verify that the form works.
13. Basic Built-In Validation
Django automatically validates many things for you.
Example
class ContactForm(forms.Form):
    name = forms.CharField(max_length=10)
    email = forms.EmailField()
Automatic checks
- required fields
- maximum length
- email format
- number format
- valid date format
If something is wrong, Django shows errors automatically.
14. Displaying Errors in Templates
If the submitted data is invalid, errors can be shown in the template.
Example
<h1>Contact Form</h1>

<form method="POST">
    {% csrf_token %}
    {{ form.as_p }}
    <button type="submit">Send</button>
</form>

{% if form.errors %}
    <div class="errors">
        {{ form.errors }}
    </div>
{% endif %}
You can also display field-specific errors more precisely.
15. Custom Validation Methods
Sometimes built-in validation is not enough. Django allows you to define your own validation methods.
There are two main ways:
- validate a single field
- validate the whole form
16. Validating a Single Field with clean_fieldname
Suppose you want to reject a certain name.
forms.py
from django import forms

class ContactForm(forms.Form):
    name = forms.CharField(max_length=100)
    email = forms.EmailField()
    message = forms.CharField(widget=forms.Textarea)

    def clean_name(self):
        name = self.cleaned_data['name']

        if name.lower() == 'admin':
            raise forms.ValidationError("This name is not allowed.")

        return name
How it works
- Django automatically calls
clean_name() - you validate the
namefield - if invalid, raise
ValidationError - if valid, return the cleaned value
17. Validating the Whole Form with clean()
Use clean() when validation depends on multiple fields together.
Example
from django import forms

class ContactForm(forms.Form):
    name = forms.CharField(max_length=100)
    email = forms.EmailField()
    message = forms.CharField(widget=forms.Textarea)

    def clean(self):
        cleaned_data = super().clean()
        name = cleaned_data.get('name')
        message = cleaned_data.get('message')

        if name and message:
            if name.lower() in message.lower():
                raise forms.ValidationError(
                    "The message should not contain the same text as the name."
                )

        return cleaned_data
Why use clean()?
Because it checks the form as a whole, not just one field.
18. Adding Initial Values
You can provide default values when defining fields.
Example
class FeedbackForm(forms.Form):
    name = forms.CharField(initial='Guest')
    message = forms.CharField(widget=forms.Textarea)
This can be useful for prefilled forms.
19. Using Choice Fields
You can create dropdown menus using ChoiceField.
Example
from django import forms

class FeedbackForm(forms.Form):
    CATEGORY_CHOICES = [
        ('general', 'General'),
        ('bug', 'Bug Report'),
        ('feature', 'Feature Request'),
    ]

    category = forms.ChoiceField(choices=CATEGORY_CHOICES)
    message = forms.CharField(widget=forms.Textarea)
This creates a select box in the browser.
20. Example: A Complete Feedback Form
forms.py
from django import forms

class FeedbackForm(forms.Form):
    name = forms.CharField(
        label='Your Name',
        max_length=100,
        widget=forms.TextInput(attrs={
            'placeholder': 'Enter your name',
            'class': 'form-control'
        })
    )
    email = forms.EmailField(
        label='Your Email',
        widget=forms.EmailInput(attrs={
            'placeholder': 'Enter your email',
            'class': 'form-control'
        })
    )
    category = forms.ChoiceField(
        choices=[
            ('general', 'General'),
            ('bug', 'Bug Report'),
            ('feature', 'Feature Request'),
        ],
        label='Category'
    )
    message = forms.CharField(
        label='Message',
        widget=forms.Textarea(attrs={
            'placeholder': 'Write your feedback',
            'class': 'form-control',
            'rows': 4
        })
    )

    def clean_name(self):
        name = self.cleaned_data['name']
        if len(name) < 3:
            raise forms.ValidationError("Name must contain at least 3 characters.")
        return name
This example includes:
- labels
- widgets
- dropdown choices
- cleaned data
- custom validation
21. Example View for the Feedback Form
views.py
from django.shortcuts import render
from .forms import FeedbackForm

def feedback(request):
    submitted = False

    if request.method == 'POST':
        form = FeedbackForm(request.POST)
        if form.is_valid():
            submitted = True
            data = form.cleaned_data
            return render(request, 'blog/feedback_success.html', {
                'data': data,
                'submitted': submitted
            })
    else:
        form = FeedbackForm()

    return render(request, 'blog/feedback.html', {'form': form})
22. Example Template for the Feedback Form
feedback.html
<h1>Feedback Form</h1>

<form method="POST">
    {% csrf_token %}
    {{ form.as_p }}
    <button type="submit">Submit</button>
</form>
23. Common Beginner Mistakes
Mistake 1: Forgetting request.POST
Wrong:
form = ContactForm()inside a POST request.
Correct:
form = ContactForm(request.POST)Mistake 2: Forgetting form.is_valid()
You should never use cleaned_data before validation.
Wrong:
name = form.cleaned_data['name']Correct:
if form.is_valid():
    name = form.cleaned_data['name']
Mistake 3: Forgetting to return cleaned value
In clean_name(), always return the value if valid.
Mistake 4: Forgetting {% csrf_token %}
Without it, Django will reject POST requests.
Mistake 5: Confusing forms.Form and forms.ModelForm
forms.Formis manualforms.ModelFormis connected to a model
This tutorial focuses on forms.Form inside forms.py.
24. Best Practices
- define forms inside
forms.py - use clear labels
- use widgets for better UI
- always validate with
is_valid() - use
cleaned_datainstead of raw POST data - use
clean_fieldname()for field-level validation - use
clean()for form-level validation
25. Beginner Analogy
Think of a Django form as a receptionist at an office.
- the user gives information
- the form checks if the information is complete and correct
- invalid information is rejected with an explanation
- valid information is cleaned and passed safely to the system
That is exactly what Django forms do.
26. Summary
In this tutorial, you learned how to create Django forms in forms.py using forms.Form. You saw how to define fields, customize labels, use widgets, process submitted data, access cleaned_data, and apply both built-in and custom validation methods.
These skills are essential for building forms such as contact pages, feedback forms, search forms, login forms, and registration forms.
27. Key Takeaways
forms.pystores your form classesforms.Formis used for manual forms- labels improve readability
- widgets customize HTML rendering
form.is_valid()performs validationcleaned_datagives safe validated dataclean_fieldname()validates a single fieldclean()validates the full form
28. Small Knowledge Check
- What is the role of
forms.pyin Django? - What is the difference between
forms.Formandforms.ModelForm? - What is a widget in Django forms?
- When can you use
cleaned_data? - What does
clean_name()do? - When should you use
clean()instead ofclean_fieldname()?
29. Conclusion
Django forms built with forms.py give you full control over user input. They help you create professional forms, validate data correctly, and process information safely. Once you master these concepts, you are ready to build more advanced form workflows in your Django applications.













💬 Comments
No comments yet. Be the first to comment!
Login to comment.