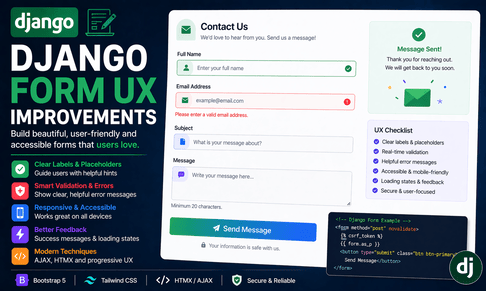
Django forms are one of the most important parts of any Django application because forms are the main way users send data to the server. Login forms, registration forms, contact forms, search forms, profile update forms, comment forms, checkout forms, newsletter forms, dashboard filters, and admin tools all depend on forms. A form may look simple, but the user experience around it can strongly affect how professional, trustworthy, and easy your application feels. A poorly designed form can confuse users, create errors, reduce conversions, and make your website feel unfinished. A well-designed form, however, guides the user clearly, validates input properly, displays helpful errors, works on mobile, respects accessibility, and gives feedback after submission.
In Django, forms are already powerful from the backend side. Django can validate fields, clean submitted data, protect against CSRF attacks, generate HTML inputs, and connect forms directly to models through ModelForm. However, the default form output is often too basic for a modern interface. This is why improving Django form UX is essential. Form UX is not only about making forms beautiful. It is also about making forms understandable, safe, responsive, accessible, and pleasant to use.
A good Django form should answer these questions clearly for the user: What information is required? What format is expected? What happens after I submit? What did I do wrong if there is an error? How can I fix it? Is my data being processed? Was my action successful? These questions are at the heart of form user experience.
1. Starting with a Basic Django Form
Let us begin with a simple contact form.
from django import forms

class ContactForm(forms.Form):
    name = forms.CharField(max_length=100)
    email = forms.EmailField()
    subject = forms.CharField(max_length=150)
    message = forms.CharField(widget=forms.Textarea)
This form works, but if rendered directly with:
{{ form.as_p }}the result is basic and not very polished. It may be acceptable for testing, but for a real website, you usually want better layout, better labels, placeholders, error messages, spacing, and styling.
2. Adding Helpful Labels and Placeholders
Labels tell users what each field means. Placeholders give examples or hints. In Django, you can customize them inside the form class.
from django import forms

class ContactForm(forms.Form):
    name = forms.CharField(
        label="Full Name",
        max_length=100,
        widget=forms.TextInput(attrs={
            "placeholder": "Enter your full name"
        })
    )

    email = forms.EmailField(
        label="Email Address",
        widget=forms.EmailInput(attrs={
            "placeholder": "example@email.com"
        })
    )

    subject = forms.CharField(
        label="Subject",
        max_length=150,
        widget=forms.TextInput(attrs={
            "placeholder": "What is your message about?"
        })
    )

    message = forms.CharField(
        label="Message",
        widget=forms.Textarea(attrs={
            "placeholder": "Write your message here...",
            "rows": 5
        })
    )
This already improves the user experience. The form becomes clearer because each field explains what the user should enter. Placeholders should not replace labels, because placeholders disappear when the user starts typing. A professional form should use both labels and placeholders where appropriate.
3. Styling Django Forms with Bootstrap
If your project uses Bootstrap, you can add Bootstrap classes directly to widgets.
class ContactForm(forms.Form):
    name = forms.CharField(
        label="Full Name",
        widget=forms.TextInput(attrs={
            "class": "form-control",
            "placeholder": "Enter your full name"
        })
    )

    email = forms.EmailField(
        label="Email Address",
        widget=forms.EmailInput(attrs={
            "class": "form-control",
            "placeholder": "example@email.com"
        })
    )

    subject = forms.CharField(
        label="Subject",
        widget=forms.TextInput(attrs={
            "class": "form-control",
            "placeholder": "Message subject"
        })
    )

    message = forms.CharField(
        label="Message",
        widget=forms.Textarea(attrs={
            "class": "form-control",
            "placeholder": "Write your message...",
            "rows": 5
        })
    )
Then the template can render each field manually:
<form method="post">
    {% csrf_token %}

    <div class="mb-3">
        <label class="form-label" for="{{ form.name.id_for_label }}">
            {{ form.name.label }}
        </label>
        {{ form.name }}
    </div>

    <div class="mb-3">
        <label class="form-label" for="{{ form.email.id_for_label }}">
            {{ form.email.label }}
        </label>
        {{ form.email }}
    </div>

    <div class="mb-3">
        <label class="form-label" for="{{ form.subject.id_for_label }}">
            {{ form.subject.label }}
        </label>
        {{ form.subject }}
    </div>

    <div class="mb-3">
        <label class="form-label" for="{{ form.message.id_for_label }}">
            {{ form.message.label }}
        </label>
        {{ form.message }}
    </div>

    <button type="submit" class="btn btn-primary">
        Send Message
    </button>
</form>
Manual rendering gives you much more control than form.as_p. You can place labels, errors, help text, icons, buttons, and layout elements exactly where you want.
4. Styling Django Forms with Tailwind CSS
If your project uses Tailwind CSS, you can add utility classes to widgets.
class ContactForm(forms.Form):
    name = forms.CharField(
        label="Full Name",
        widget=forms.TextInput(attrs={
            "class": "w-full rounded-xl border border-gray-300 px-4 py-3 text-gray-800 focus:outline-none focus:ring-2 focus:ring-blue-500",
            "placeholder": "Enter your full name"
        })
    )

    email = forms.EmailField(
        label="Email Address",
        widget=forms.EmailInput(attrs={
            "class": "w-full rounded-xl border border-gray-300 px-4 py-3 text-gray-800 focus:outline-none focus:ring-2 focus:ring-blue-500",
            "placeholder": "example@email.com"
        })
    )

    message = forms.CharField(
        label="Message",
        widget=forms.Textarea(attrs={
            "class": "w-full rounded-xl border border-gray-300 px-4 py-3 text-gray-800 focus:outline-none focus:ring-2 focus:ring-blue-500",
            "placeholder": "Write your message...",
            "rows": 5
        })
    )
Template:
<form method="post" class="space-y-6">
    {% csrf_token %}

    <div>
        <label for="{{ form.name.id_for_label }}" class="block text-sm font-medium text-gray-700 mb-2">
            {{ form.name.label }}
        </label>
        {{ form.name }}
    </div>

    <div>
        <label for="{{ form.email.id_for_label }}" class="block text-sm font-medium text-gray-700 mb-2">
            {{ form.email.label }}
        </label>
        {{ form.email }}
    </div>

    <div>
        <label for="{{ form.message.id_for_label }}" class="block text-sm font-medium text-gray-700 mb-2">
            {{ form.message.label }}
        </label>
        {{ form.message }}
    </div>

    <button type="submit" class="rounded-xl bg-blue-600 px-6 py-3 text-white font-medium hover:bg-blue-700 transition">
        Send Message
    </button>
</form>
Tailwind gives you precise control over spacing, borders, focus states, and colors.
5. Displaying Field Errors Clearly
One of the most important UX improvements is clear error display. Users should not have to guess what went wrong.
<div class="mb-3">
    <label class="form-label" for="{{ form.email.id_for_label }}">
        {{ form.email.label }}
    </label>

    {{ form.email }}

    {% if form.email.errors %}
        <div class="text-danger small mt-1">
            {% for error in form.email.errors %}
                <div>{{ error }}</div>
            {% endfor %}
        </div>
    {% endif %}
</div>
For Tailwind:
{% if form.email.errors %}
    <div class="mt-2 text-sm text-red-600">
        {% for error in form.email.errors %}
            <p>{{ error }}</p>
        {% endfor %}
    </div>
{% endif %}
Good errors should be specific. Instead of saying “Invalid input”, say “Enter a valid email address.”
6. Customizing Error Messages in Django
You can define custom error messages inside the form.
class RegisterForm(forms.Form):
    username = forms.CharField(
        max_length=50,
        error_messages={
            "required": "Please enter a username.",
            "max_length": "Your username is too long.",
        }
    )

    email = forms.EmailField(
        error_messages={
            "required": "Please enter your email address.",
            "invalid": "Please enter a valid email address.",
        }
    )
Custom messages make your form more human and easier to understand.
7. Adding Help Text
Help text explains rules before the user makes a mistake.
password = forms.CharField(
    widget=forms.PasswordInput,
    help_text="Your password must contain at least 8 characters."
)
Template:
{{ form.password }}

{% if form.password.help_text %}
    <div class="form-text">
        {{ form.password.help_text }}
    </div>
{% endif %}
Help text is useful for passwords, usernames, file uploads, phone numbers, and complex fields.
8. Improving Password Fields
Password forms should provide clear requirements and use the correct widget.
class RegisterForm(forms.Form):
    password = forms.CharField(
        label="Password",
        widget=forms.PasswordInput(attrs={
            "class": "form-control",
            "placeholder": "Create a secure password"
        }),
        help_text="Use at least 8 characters with letters and numbers."
    )

    confirm_password = forms.CharField(
        label="Confirm Password",
        widget=forms.PasswordInput(attrs={
            "class": "form-control",
            "placeholder": "Repeat your password"
        })
    )

    def clean(self):
        cleaned_data = super().clean()
        password = cleaned_data.get("password")
        confirm_password = cleaned_data.get("confirm_password")

        if password and confirm_password and password != confirm_password:
            raise forms.ValidationError("Passwords do not match.")

        return cleaned_data
This improves both security and usability.
9. Showing Non-Field Errors
Some errors do not belong to one field. For example, password confirmation failure or login failure.
{% if form.non_field_errors %}
    <div class="alert alert-danger">
        {% for error in form.non_field_errors %}
            <div>{{ error }}</div>
        {% endfor %}
    </div>
{% endif %}
Non-field errors should appear near the top of the form so users see them immediately.
10. Using Django Messages After Submission
After a successful form submission, show feedback.
from django.contrib import messages
from django.shortcuts import render, redirect

def contact_view(request):
    if request.method == "POST":
        form = ContactForm(request.POST)

        if form.is_valid():
            messages.success(request, "Your message has been sent successfully.")
            return redirect("contact")
    else:
        form = ContactForm()

    return render(request, "contact.html", {"form": form})
In the base template:
{% if messages %}
    {% for message in messages %}
        <div class="alert alert-{{ message.tags }}">
            {{ message }}
        </div>
    {% endfor %}
{% endif %}
This confirms the user’s action and improves trust.
11. Avoiding Duplicate Form Submissions
A common problem is that users click the submit button multiple times. You can disable the button with JavaScript.
<form method="post" onsubmit="this.querySelector('button[type=submit]').disabled = true;">
    {% csrf_token %}
    {{ form.as_p }}
    <button type="submit">Submit</button>
</form>
A better version changes the button text:
<form method="post" id="my-form">
    {% csrf_token %}
    {{ form.as_p }}
    <button type="submit" id="submit-btn">Submit</button>
</form>

<script>
    document.getElementById("my-form").addEventListener("submit", function() {
        const btn = document.getElementById("submit-btn");
        btn.disabled = true;
        btn.textContent = "Submitting...";
    });
</script>
This gives users clear feedback that something is happening.
12. Improving Search Forms
Search forms should be simple and fast.
<form method="get" action="{% url 'search' %}" class="d-flex gap-2">
    <input
        type="search"
        name="q"
        class="form-control"
        placeholder="Search articles..."
        value="{{ request.GET.q }}"
    >
    <button class="btn btn-primary" type="submit">Search</button>
</form>
Keeping the search query in the input after submission helps users understand what they searched for.
13. Improving File Upload Forms
File upload forms need special attention because users need to know allowed file types and size limits.
class UploadForm(forms.Form):
    file = forms.FileField(
        help_text="Allowed formats: PDF, PNG, JPG. Maximum size: 5MB."
    )
Template:
<form method="post" enctype="multipart/form-data">
    {% csrf_token %}

    {{ form.file }}

    {% if form.file.help_text %}
        <div class="form-text">{{ form.file.help_text }}</div>
    {% endif %}

    <button type="submit">Upload</button>
</form>
Do not forget enctype="multipart/form-data" when uploading files.
14. Adding Validation in the Form Class
Frontend validation is helpful, but backend validation is essential.
class ContactForm(forms.Form):
    message = forms.CharField(widget=forms.Textarea)

    def clean_message(self):
        message = self.cleaned_data["message"]

        if len(message) < 20:
            raise forms.ValidationError("Your message must contain at least 20 characters.")

        return message
This protects your application even if users bypass frontend validation.
15. Using ModelForms for Better Maintainability
For forms connected to models, use ModelForm.
from django import forms
from .models import Article

class ArticleForm(forms.ModelForm):
    class Meta:
        model = Article
        fields = ["title", "category", "content", "status"]
        widgets = {
            "title": forms.TextInput(attrs={
                "class": "form-control",
                "placeholder": "Article title"
            }),
            "content": forms.Textarea(attrs={
                "class": "form-control",
                "rows": 8,
                "placeholder": "Write your article content..."
            }),
            "status": forms.Select(attrs={
                "class": "form-select"
            }),
            "category": forms.Select(attrs={
                "class": "form-select"
            }),
        }
This keeps form logic close to your model structure.
16. Creating a Reusable Field Template
For large projects, repeating field markup becomes annoying. You can create a reusable field partial.
templates/includes/form_field.html:
<div class="mb-3">
    <label for="{{ field.id_for_label }}" class="form-label">
        {{ field.label }}
    </label>

    {{ field }}

    {% if field.help_text %}
        <div class="form-text">{{ field.help_text }}</div>
    {% endif %}

    {% if field.errors %}
        <div class="text-danger small mt-1">
            {% for error in field.errors %}
                <div>{{ error }}</div>
            {% endfor %}
        </div>
    {% endif %}
</div>
Then use it:
<form method="post">
    {% csrf_token %}

    {% include "includes/form_field.html" with field=form.title %}
    {% include "includes/form_field.html" with field=form.category %}
    {% include "includes/form_field.html" with field=form.content %}

    <button type="submit" class="btn btn-primary">Save</button>
</form>
This keeps templates clean and consistent.
17. Accessibility Best Practices
A form should be accessible for all users. Important rules:
Always use labels.
Connect labels to fields using id_for_label.
Do not rely only on placeholder text.
Use clear error messages.
Make focus states visible.
Keep keyboard navigation working.
Use enough color contrast.
Example:
<label for="{{ form.email.id_for_label }}">
    Email Address
</label>
{{ form.email }}
Accessibility is not optional. It improves usability for everyone.
18. Mobile-Friendly Form Layouts
Many users fill forms on mobile. Avoid tiny fields, cramped spacing, and small buttons.
Good mobile form principles:
Use full-width inputs.
Use large enough padding.
Keep forms short.
Group related fields.
Avoid too many columns on small screens.
Use responsive layout classes.
Bootstrap example:
<div class="row">
    <div class="col-md-6 mb-3">
        {{ form.first_name }}
    </div>
    <div class="col-md-6 mb-3">
        {{ form.last_name }}
    </div>
</div>
On mobile, these columns stack automatically.
19. Using Crispy Forms
django-crispy-forms is a popular package for rendering beautiful forms with less repetitive template code.
Installation:
pip install django-crispy-forms crispy-bootstrap5Settings:
INSTALLED_APPS = [
    "crispy_forms",
    "crispy_bootstrap5",
]

CRISPY_ALLOWED_TEMPLATE_PACKS = "bootstrap5"
CRISPY_TEMPLATE_PACK = "bootstrap5"
Template:
{% load crispy_forms_tags %}

<form method="post">
    {% csrf_token %}
    {{ form|crispy }}
    <button type="submit" class="btn btn-primary">Submit</button>
</form>
Crispy Forms can save time, especially in Bootstrap projects.
20. Using AJAX or HTMX for Better Form UX
For modern interfaces, forms can submit without a full page reload.
HTMX example:
<form
    method="post"
    hx-post="{% url 'contact' %}"
    hx-target="#form-result"
    hx-swap="innerHTML">
    {% csrf_token %}
    {{ form.as_p }}
    <button type="submit">Send</button>
</form>

<div id="form-result"></div>
The Django view can return a partial template with success or error messages. This creates a smoother experience while keeping Django in control.
21. Security Considerations
Good form UX must also be secure. Always remember:
Use CSRF protection.
Validate data on the server.
Never trust frontend validation only.
Sanitize uploaded files.
Check permissions before saving data.
Do not expose sensitive errors.
Use secure password handling.
Example:
<form method="post">
    {% csrf_token %}
    ...
</form>
CSRF is essential for POST forms in Django.
22. Complete Example: Professional Contact Form
forms.py:
from django import forms

class ContactForm(forms.Form):
    name = forms.CharField(
        label="Full Name",
        max_length=100,
        widget=forms.TextInput(attrs={
            "class": "form-control",
            "placeholder": "Enter your full name"
        }),
        error_messages={
            "required": "Please enter your full name."
        }
    )

    email = forms.EmailField(
        label="Email Address",
        widget=forms.EmailInput(attrs={
            "class": "form-control",
            "placeholder": "example@email.com"
        }),
        error_messages={
            "required": "Please enter your email address.",
            "invalid": "Please enter a valid email address."
        }
    )

    message = forms.CharField(
        label="Message",
        widget=forms.Textarea(attrs={
            "class": "form-control",
            "rows": 5,
            "placeholder": "Write your message here..."
        }),
        error_messages={
            "required": "Please write your message."
        }
    )

    def clean_message(self):
        message = self.cleaned_data["message"]

        if len(message) < 20:
            raise forms.ValidationError("Your message must contain at least 20 characters.")

return messageviews.py:
from django.shortcuts import render, redirect
from django.contrib import messages
from .forms import ContactForm

def contact_view(request):
    if request.method == "POST":
        form = ContactForm(request.POST)

        if form.is_valid():
            messages.success(request, "Your message has been sent successfully.")
            return redirect("contact")
    else:
        form = ContactForm()

return render(request, "contact.html", {"form": form})contact.html:
{% extends "base.html" %}

{% block content %}
<div class="container py-5">
    <div class="row justify-content-center">
        <div class="col-md-8 col-lg-6">

            <div class="card shadow-sm border-0">
                <div class="card-body p-4">
                    <h1 class="h3 fw-bold mb-2">Contact Us</h1>
                    <p class="text-muted mb-4">
                        Fill out the form below and we will get back to you soon.
                    </p>

                    {% if form.non_field_errors %}
                        <div class="alert alert-danger">
                            {% for error in form.non_field_errors %}
                                <div>{{ error }}</div>
                            {% endfor %}
                        </div>
                    {% endif %}

                    <form method="post">
                        {% csrf_token %}

                        <div class="mb-3">
                            <label class="form-label" for="{{ form.name.id_for_label }}">
                                {{ form.name.label }}
                            </label>
                            {{ form.name }}

                            {% if form.name.errors %}
                                <div class="text-danger small mt-1">
                                    {% for error in form.name.errors %}
                                        <div>{{ error }}</div>
                                    {% endfor %}
                                </div>
                            {% endif %}
                        </div>

                        <div class="mb-3">
                            <label class="form-label" for="{{ form.email.id_for_label }}">
                                {{ form.email.label }}
                            </label>
                            {{ form.email }}

                            {% if form.email.errors %}
                                <div class="text-danger small mt-1">
                                    {% for error in form.email.errors %}
                                        <div>{{ error }}</div>
                                    {% endfor %}
                                </div>
                            {% endif %}
                        </div>

                        <div class="mb-3">
                            <label class="form-label" for="{{ form.message.id_for_label }}">
                                {{ form.message.label }}
                            </label>
                            {{ form.message }}

                            {% if form.message.errors %}
                                <div class="text-danger small mt-1">
                                    {% for error in form.message.errors %}
                                        <div>{{ error }}</div>
                                    {% endfor %}
                                </div>
                            {% endif %}
                        </div>

                        <button type="submit" class="btn btn-primary w-100">
                            Send Message
                        </button>
                    </form>

                </div>
            </div>

        </div>
    </div>
</div>
{% endblock %}
Conclusion
Django forms are powerful, but good form UX requires more than simply rendering {{ form.as_p }}. A professional form should be clear, attractive, responsive, secure, and helpful. Users should understand what each field means, what format is expected, what errors occurred, and what happened after submission.
By improving labels, placeholders, widgets, help text, validation messages, layout, styling, accessibility, and feedback, you can transform basic Django forms into polished user interfaces. Whether you use Bootstrap, Tailwind CSS, crispy forms, AJAX, or HTMX, the goal remains the same: make forms easier and more pleasant for users while keeping Django’s strong backend validation and security.
A well-designed form can improve trust, reduce mistakes, increase completion rates, and make your Django application feel much more professional.












💬 Comments
No comments yet. Be the first to comment!
Login to comment.