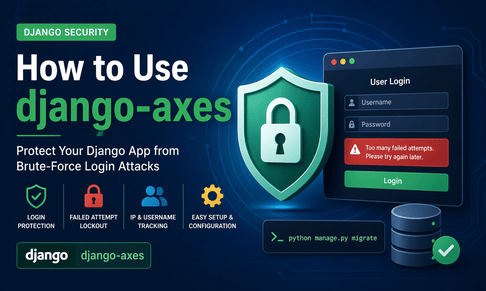
When you build a Django application, one of the first security realities you need to accept is that your login page will eventually be targeted. It does not matter whether your project is a personal dashboard, an internal company portal, an e-learning platform, or a public SaaS product: attackers and bots routinely test login forms with repeated password guesses, reused credential lists, and automated brute-force attempts. Django already gives you a strong authentication system, but by default it does not block repeated failed login attempts in the way many production systems need. That is where django-axes becomes extremely useful. The package is designed to monitor failed authentication attempts and enforce lockouts when configured thresholds are exceeded. In the current documentation, the project describes itself as a Django plugin for tracking suspicious login attempts and implementing brute-force blocking, and the current PyPI release listed is 8.3.1. The docs also note that it works with supported Django versions and Python 3.9+.
At a practical level, django-axes sits inside Django’s authentication flow rather than replacing it. That distinction matters. It does not become your main authentication system; instead, it monitors and controls access attempts around Django authentication. The official architecture docs explain that Axes augments the usual Django login flow through three main pieces: an authentication backend, signal receivers, and middleware. When a login attempt matches a lockout rule, the backend can raise PermissionDenied, which stops the normal backend chain and blocks the login before the user gets authenticated. This means django-axes is best understood as a protective layer wrapped around your login process, not a substitute for Django’s own User model, password hashing, or login views.
A major reason developers like django-axes is that it is simple to get working in a normal Django project. The official installation guide says you can install it either as plain django-axes or as django-axes[ipware]. The ipware extra is recommended when you want django-axes to resolve real client IP addresses using django-ipware, especially when your site is behind proxies or load balancers. After installation, the docs instruct you to add axes to INSTALLED_APPS, place axes.backends.AxesStandaloneBackend at the top of AUTHENTICATION_BACKENDS, add axes.middleware.AxesMiddleware to MIDDLEWARE, run python manage.py check, and then run python manage.py migrate. The docs also explain that AxesMiddleware should be last in the middleware list because it mainly formats lockout responses, and that python manage.py check is important because misconfiguration can silently weaken protection.
A clean starting configuration in settings.py often looks like this:
INSTALLED_APPS = [
    "django.contrib.admin",
    "django.contrib.auth",
    "django.contrib.contenttypes",
    "django.contrib.sessions",
    "django.contrib.messages",
    "django.contrib.staticfiles",
    "axes",
]

AUTHENTICATION_BACKENDS = [
    "axes.backends.AxesStandaloneBackend",
    "django.contrib.auth.backends.ModelBackend",
]

MIDDLEWARE = [
    "django.middleware.security.SecurityMiddleware",
    "django.contrib.sessions.middleware.SessionMiddleware",
    "django.middleware.common.CommonMiddleware",
    "django.middleware.csrf.CsrfViewMiddleware",
    "django.contrib.auth.middleware.AuthenticationMiddleware",
    "django.contrib.messages.middleware.MessageMiddleware",
    "django.middleware.clickjacking.XFrameOptionsMiddleware",
    "axes.middleware.AxesMiddleware",
]
This setup is enough to make Axes functional with default behavior after migrations. If you are using the default database handler, django-axes will start storing failed attempts in your database and will lock users out when they exceed the configured maximum attempts. That default behavior is one reason the package is appealing for many teams: you can start with a basic security baseline very quickly and then tighten it later based on your project’s needs.
One subtle but extremely important point is the order of the authentication backends. The documentation explicitly says that AxesStandaloneBackend should be the first backend in AUTHENTICATION_BACKENDS. That is because Axes must get the first chance to inspect the request and decide whether the user is already locked out. If you place another backend before it, you may accidentally allow authentication to proceed before Axes gets a chance to intervene. The docs also note that AxesBackend remains available for backward compatibility, and that the difference is that AxesBackend also includes Django ModelBackend permissions behavior. In most projects today, the safer and clearer recommendation is to use AxesStandaloneBackend plus your normal backend explicitly after it.
Once the package is installed, the next step is tuning the lockout policy. The configuration docs show classic examples such as AXES_FAILURE_LIMIT = 3 with a 30 minute cooloff, a rolling window example with 5 failures in 15 minutes, and a hard lockout configuration where AXES_COOLOFF_TIME = None, meaning the lockout must be reset manually. In real projects, the right threshold depends on your audience and risk level. A small internal portal with known users may tolerate a stricter limit, while a public consumer site may need to allow for a few more accidental password mistakes before blocking. The point of django-axes is that you can express that policy in settings rather than rewriting your login logic by hand.
Here is an example configuration that many projects can use as a solid production-oriented baseline:
from datetime import timedelta

AXES_FAILURE_LIMIT = 5
AXES_COOLOFF_TIME = timedelta(minutes=30)
AXES_LOCK_OUT_AT_FAILURE = True
With this configuration, a user or IP that crosses five failed attempts will be locked out for thirty minutes. That is often a sensible default for ordinary web applications because it is strict enough to slow brute-force tools but not so strict that one typo blocks a legitimate user for hours. Still, security is contextual. If your app protects sensitive financial or academic data, you may want more aggressive settings or additional layers such as CAPTCHA, email notifications, 2FA, or IP reputation checks.
Another important design decision is how you want Axes to identify repeated failures. The documentation explains the precedence of monitoring strategies: by default it tracks by IP address, but you can also configure username-only failures or lockouts based on the combination of username and IP. The docs specifically mention AXES_ONLY_USER_FAILURES and AXES_LOCK_OUT_BY_COMBINATION_USER_AND_IP, while more recent usage guidance also shows AXES_LOCKOUT_PARAMETERS = ["username"] as a way to block by username only. This matters because different products have different risk profiles. If many users share the same office network, pure IP-based blocking can cause unfair lockouts for innocent users. If you only block by username, you reduce collateral damage but may accept more distributed attacks from many IP addresses. If you block by username plus IP, you gain precision but may let attackers keep trying the same username from many different IPs.
For example, if your users often authenticate with email addresses and may be behind shared connections, username-oriented protection can be more user-friendly:
AXES_LOCKOUT_PARAMETERS = ["username"]
AXES_CLIENT_IP_CALLABLE = lambda request: None
The official usage guide even presents this as a privacy-conscious pattern: block by username only and disable storage of client IP addresses entirely. That can be a very good choice when you want to reduce personal data storage, especially in environments where privacy regulation or internal policy discourages storing IP addresses unless strictly necessary. The docs frame this in the context of data privacy and GDPR, emphasizing the principle that you should not store what you do not need.
At this stage, many developers ask: “Will django-axes work automatically with my custom login view?” Usually yes, but there is one condition you must respect: the request object must be supplied to Django’s authenticate() call. The usage docs are very clear that Axes needs a request argument passed into Django’s stock authenticate function in order to monitor authentication correctly. If your custom login code forgets to pass the request, you can get errors or silently broken monitoring depending on the integration path. This is one of the most common mistakes people make when they wire custom authentication code by hand.
A correct custom login view looks like this:
from django.contrib.auth import authenticate, login
from django.shortcuts import render, redirect

def custom_login_view(request):
    if request.method == "POST":
        username = request.POST.get("username")
        password = request.POST.get("password")

        user = authenticate(
            request=request,
            username=username,
            password=password,
        )

        if user is not None:
            login(request, user)
            return redirect("dashboard")

        return render(request, "login.html", {
            "error": "Invalid credentials or account temporarily locked."
        })

    return render(request, "login.html")
The key detail here is not the login() call; it is the request=request argument inside authenticate(). Without that, Axes cannot reliably associate attempts with the HTTP request context, which is essential for IP-based monitoring, middleware integration, and lockout handling.
In projects that use Django admin, django-axes is especially useful because the admin login is a favorite target for automated attacks. Since admin authentication goes through Django’s auth system, Axes can protect it with the same settings. You do not need to invent separate brute-force logic for /admin/. That alone can remove a surprising amount of risk from small-to-medium Django deployments, because many sites expose admin without additional rate-limiting or intrusion monitoring. Axes gives you a focused layer of control at the exact place where repeated failed logins matter most. The handler API and architecture docs also make clear that the package is designed to support checks like blacklisting, whitelisting, request frequency monitoring, and lockouts through its configurable handler system.
If your site runs behind Nginx, HAProxy, Cloudflare, a load balancer, or another reverse proxy, IP handling becomes critical. The configuration docs state that Axes uses django-ipware for client IP detection when available, and that reverse-proxy deployments usually require configuring settings such as AXES_IPWARE_PROXY_COUNT and AXES_IPWARE_META_PRECEDENCE_ORDER so Axes can resolve the real client IP correctly. If you ignore this and your server only sees the proxy IP, then lockouts can become inaccurate or even dangerous, because many unrelated users may appear to come from the same address. In other words, when reverse proxies are involved, correct IP resolution is not an optimization; it is a core security requirement.
A typical reverse-proxy-aware configuration might look like this:
AXES_IPWARE_PROXY_COUNT = 1
AXES_IPWARE_META_PRECEDENCE_ORDER = (
    "HTTP_X_FORWARDED_FOR",
    "REMOTE_ADDR",
)
You should adapt those values to your deployment. If you have multiple proxies in front of Django, the count and header precedence need to reflect your actual infrastructure. You also need to ensure your proxy is configured to set trustworthy forwarding headers. django-axes can only work with the request metadata it receives; it cannot fix a broken or spoofable proxy chain by itself.
For Django REST Framework, the middleware becomes more significant. The API reference explicitly says AxesMiddleware maps lockout signals into HTTP 403 responses and is needed for DRF integration because DRF uses its own request object. That means if your login endpoint is API-based rather than form-based, you should be more deliberate about testing the exact response behavior and message formatting after lockout. Some teams install the backend correctly but forget to validate their API lockout path end-to-end, then discover too late that their frontend receives an unexpected error shape. The docs make it clear that middleware is not only decorative; in DRF integrations it plays a concrete role in request adaptation and user-facing lockout responses.
For an API login endpoint, a simplified DRF view might look like this:
from django.contrib.auth import authenticate
from rest_framework.response import Response
from rest_framework.views import APIView
from rest_framework import status

class LoginAPIView(APIView):
    authentication_classes = []
    permission_classes = []

    def post(self, request):
        username = request.data.get("username")
        password = request.data.get("password")

        user = authenticate(
            request=request,
            username=username,
            password=password,
        )

        if user is None:
            return Response(
                {"detail": "Invalid credentials or account locked."},
                status=status.HTTP_400_BAD_REQUEST
            )

        return Response({"detail": "Login successful"})
In a real JWT-based or session-based API, you would issue a token or log the user in, but the important Axes-related detail remains the same: pass the request into authenticate() and test how lockouts are surfaced once the threshold is exceeded.
One of django-axes’ strengths is that it provides multiple ways to reset lockouts. The usage docs explain that with the default database handler you can reset attempts from the Django admin UI, from management commands, or programmatically. The documented commands include axes_reset, axes_reset_ip, axes_reset_username, axes_reset_ip_username, and axes_reset_logs. The usage docs also show that you can reset attempts in code with axes.utils.reset(). This is very practical in operations: support teams can unlock a legitimate user after identity verification, developers can clear test lockouts locally, and cron or admin workflows can clean old records.
Examples:
python manage.py axes_reset
python manage.py axes_reset_ip 203.0.113.10
python manage.py axes_reset_username admin@example.com
python manage.py axes_reset_ip_username 203.0.113.10 admin@example.com
python manage.py axes_reset_logs 30
And programmatically:
from axes.utils import reset

# Reset everything
reset()

# Reset by username
reset(username="admin@example.com")

# Reset by IP
reset(ip="203.0.113.10")
The docs note an important detail: if you pass both username and IP to reset, the behavior is effectively an AND, not an OR. So it resets attempts matching both values together, not either one independently. That is exactly the kind of operational nuance worth knowing before you build admin tools around it.
Under the hood, Axes uses a handler abstraction, and the API reference says the default implementation is axes.handlers.database.AxesDatabaseHandler. The docs also explain that you can set AXES_HANDLER to use another handler class. This is where django-axes becomes more than a “simple login plugin” and starts to feel like a flexible security component. A database handler is a sensible default because it is easy to inspect, query, and reset. But the configuration docs also discuss a cache-based handler and warn that local in-memory caches can behave unpredictably across multiple Django processes, since one process may not see another process’s cached lockouts or resets. The docs explicitly warn against relying on backends like LocMemCache, DummyCache, or FileBasedCache for shared application-wide lockout behavior, and suggest using a shared cache such as Memcached or Redis-backed configurations instead.
For example, if you want a separate shared cache just for Axes:
CACHES = {
    "default": {
        "BACKEND": "django.core.cache.backends.locmem.LocMemCache",
        "LOCATION": "default-cache",
    },
    "axes": {
        "BACKEND": "django.core.cache.backends.redis.RedisCache",
        "LOCATION": "redis://127.0.0.1:6379/1",
    },
}

AXES_HANDLER = "axes.handlers.cache.AxesCacheHandler"
AXES_CACHE = "axes"
That kind of setup can make sense in horizontally scaled deployments, but only if the cache is truly shared across all Django processes and servers. Otherwise, one application instance may think a user is locked while another thinks the same user is free to try again.
Another advanced topic is testing. The documentation notes that some test flows do not provide request objects in the same way your real application does, and it explicitly mentions that if tests fail or integrations behave oddly, you may disable Axes in test settings with AXES_ENABLED = False. The changelog also records that this flag exists partly because Django test client methods like login, logout, and force_login do not always provide the request context Axes expects. This is a good reminder that security middleware and authentication instrumentation often behave differently in isolated tests than in browser-driven real flows. In test environments, it is often reasonable to disable Axes unless the purpose of the test is specifically to verify lockout behavior.
A simple test override could be:
# settings_test.py
AXES_ENABLED = False
Then in your dedicated security tests, you can re-enable it and explicitly simulate repeated failed login attempts to make sure the thresholds, messages, and resets work as expected.
If you are upgrading an older project, version changes matter. The installation docs note that in version 8 some database-related utility functions moved from axes.helpers into axes.handlers.database.AxesDatabaseHandler. They also note a version 7 change where a callable used for AXES_COOLOFF_TIME must now accept at least a request argument. The same installation page also explains that django-ipware is now an optional dependency rather than a built-in default dependency, which means older projects upgrading to newer versions may need to change their install command to django-axes[ipware] if they rely on that behavior. These are not dramatic changes, but they are exactly the sort of upgrade details that can break an otherwise correct configuration if you copy old blog posts blindly.
A modern callable cooloff example would be:
from datetime import timedelta

AXES_COOLOFF_TIME = lambda request: timedelta(hours=2)
If you still use an old no-argument callable from older versions, you should update it.
There is also a broader design lesson here: django-axes is strongest when it is part of a layered authentication defense, not your only protection. Brute-force defense is important, but it is only one aspect of login security. In production, you should still use HTTPS, strong password hashing through Django defaults, secure session settings, CSRF protection for form logins, 2FA for admin or high-risk users, and possibly CAPTCHA or email alerts after repeated failures. Axes is excellent at slowing or stopping repeated credential guessing, but it cannot protect you from every auth threat by itself. It does not replace secure password policies, account recovery controls, or protection against credential stuffing using valid stolen passwords.
In user experience terms, you should think carefully about how you present lockouts. A secure application should avoid leaking too much information, but it should still give legitimate users a path forward. A generic message like “Invalid credentials or account temporarily locked. Please try again later or contact support” is usually better than a message that clearly confirms whether the account exists. If you use django-axes on a customer-facing application, support procedures matter just as much as settings. Someone on your team should know how to inspect attempts, reset a mistaken lockout, and distinguish malicious automation from normal user error.
Here is a more complete sample configuration block that many Django teams can use as a strong starting point:
from datetime import timedelta

INSTALLED_APPS = [
    # ...
    "axes",
]

AUTHENTICATION_BACKENDS = [
    "axes.backends.AxesStandaloneBackend",
    "django.contrib.auth.backends.ModelBackend",
]

MIDDLEWARE = [
    # ...
    "axes.middleware.AxesMiddleware",
]

AXES_FAILURE_LIMIT = 5
AXES_COOLOFF_TIME = timedelta(minutes=30)
AXES_LOCK_OUT_AT_FAILURE = True

# Optional: track by username only for privacy-friendly setups
# AXES_LOCKOUT_PARAMETERS = ["username"]
# AXES_CLIENT_IP_CALLABLE = lambda request: None

# Optional: proxy-aware IP resolution
# AXES_IPWARE_PROXY_COUNT = 1
# AXES_IPWARE_META_PRECEDENCE_ORDER = ("HTTP_X_FORWARDED_FOR", "REMOTE_ADDR")
Then run:
pip install django-axes[ipware]
python manage.py check
python manage.py migrate
And in every custom login flow, make sure you do this:
user = authenticate(request=request, username=username, password=password)That last line is small, but it is one of the most important details in the whole integration.
To conclude, django-axes is one of the most practical security packages you can add to a Django application because it solves a very real problem with relatively little code. It plugs into Django’s authentication flow, tracks failed attempts, supports lockouts, works with admin and custom auth flows, provides reset commands, and offers flexible configuration for IP-based, username-based, or combined lockout strategies. The current docs also show that it supports modern Django/Python environments and continues to evolve, including version-specific upgrade notes and handler-based extensibility. If you use it thoughtfully—especially with correct backend ordering, request-aware authentication calls, and proper proxy configuration—it can significantly strengthen the security posture of your login system without making your codebase messy.










💬 Comments
No comments yet. Be the first to comment!
Login to comment.