1. What we are building
We are building a small but realistic MofidTech-style web platform where users can access online developer tools.
For this project, we will include:
- a homepage
- a tools homepage
- one real tool: Base64 Encoder / Decoder
- PostgreSQL for data storage
- Redis for caching and background task broker
- Celery worker for async tasks
- Celery Beat for scheduled tasks
- Nginx as reverse proxy and static files server
- Docker Compose to orchestrate everything
This is important because many beginners learn Docker Compose with very small examples, but they never really understand how it helps in a real project. In practice, Docker Compose is most useful when an application has several services that depend on each other. A Django website alone is not enough to show the real strength of Compose. But when you combine a web app, a database, a cache system, background workers, and a reverse proxy, Docker Compose becomes extremely valuable because it gives you a single place to define how the entire system runs.
2. Why this project is realistic
A real web platform is rarely just one process. Even a modest production-ready site usually has:
- a web server
- an application server
- a database
- sometimes a cache
- sometimes background jobs
- static file serving
- environment-based configuration
That is exactly what we are going to build.
This architecture is also close to how a MofidTech platform can evolve. Today it may host one tool, but tomorrow it may include a dozen tools, user accounts, saved history, scheduled reports, caching, uploads, and admin workflows. If you start with a good Docker Compose structure, you prepare the project for growth instead of having to rebuild the architecture later.
3. Final architecture overview
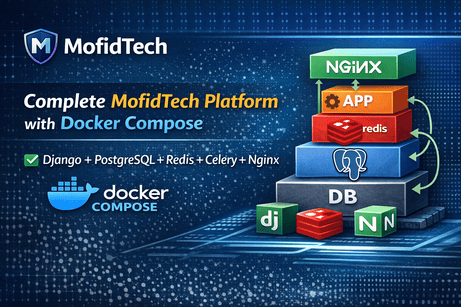
Here is the service flow:
- Browser
- Nginx
- Django web app (Gunicorn)
- PostgreSQL
- Redis
- Celery Worker
- Celery Beat
How requests move
When a visitor opens your site, the browser sends the request to Nginx. Nginx acts as the entry point. It decides whether the request is for static files, media files, or dynamic pages. If the request is for a Django page such as the homepage or a tool page, Nginx forwards it to the Django container running with Gunicorn. Django may query PostgreSQL to get data, use Redis for cache, or dispatch a background task to Celery. Celery Worker executes those async jobs, and Celery Beat can trigger scheduled jobs at regular intervals.
This separation of responsibilities is one of the biggest strengths of containerized architecture. Each service has one clear role, and Docker Compose describes how all those roles connect together.
4. Folder structure we want
At the end, our project will look like this:
mofidtech_compose/
│
├── app/
│   ├── config/
│   │   ├── __init__.py
│   │   ├── asgi.py
│   │   ├── celery.py
│   │   ├── settings.py
│   │   ├── urls.py
│   │   └── wsgi.py
│   │
│   ├── core/
│   │   ├── admin.py
│   │   ├── apps.py
│   │   ├── models.py
│   │   ├── urls.py
│   │   └── views.py
│   │
│   ├── tools/
│   │   ├── admin.py
│   │   ├── apps.py
│   │   ├── tasks.py
│   │   ├── urls.py
│   │   └── views.py
│   │
│   ├── templates/
│   │   ├── base.html
│   │   ├── core/
│   │   │   └── home.html
│   │   └── tools/
│   │       ├── tools_home.html
│   │       └── base64_tool.html
│   │
│   ├── static/
│   │   └── css/
│   │       └── style.css
│   │
│   └── manage.py
│
├── nginx/
│   └── default.conf
│
├── Dockerfile
├── docker-compose.yml
├── entrypoint.sh
├── requirements.txt
└── .env
This structure is clean because each concern has its place. The app/ folder contains Django code. The nginx/ folder contains the Nginx configuration. The root files define how the container environment works. A good project structure matters because once your app grows, bad organization quickly becomes painful.
5. Step 1 — Create the project folder
mkdir mofidtech_compose
cd mofidtech_compose
mkdir app nginx
touch Dockerfile docker-compose.yml requirements.txt .env entrypoint.sh
6. Step 2 — Create requirements.txt
Create requirements.txt:
Django>=5.0,<6.0
gunicorn
psycopg2-binary
redis
celery
django-redis
python-dotenv
Deep explanation
Each package plays a specific role:
- Django is the web framework.
- gunicorn is the application server that runs Django in production mode.
- psycopg2-binary is the PostgreSQL driver for Python.
- redis lets Python talk to the Redis server.
- celery runs asynchronous and scheduled background tasks.
- django-redis integrates Redis cleanly into Django’s cache system.
- python-dotenv can help with environment variable handling if needed.
In small tutorials, people often install only Django and maybe Gunicorn. But in real projects, the surrounding services matter just as much as the framework itself. This list reflects a more realistic stack.
7. Step 3 — Create the Dockerfile
Create Dockerfile:
FROM python:3.12-slim

ENV PYTHONDONTWRITEBYTECODE=1
ENV PYTHONUNBUFFERED=1

WORKDIR /app

RUN apt-get update && apt-get install -y \
    build-essential \
    libpq-dev \
    netcat-openbsd \
    && rm -rf /var/lib/apt/lists/*

COPY requirements.txt /app/
RUN pip install --no-cache-dir -r requirements.txt

COPY ./app /app/
COPY ./entrypoint.sh /entrypoint.sh

RUN chmod +x /entrypoint.sh
Deep explanation
This file tells Docker how to build the image used by the Django app, Celery worker, and Celery Beat.
We start from python:3.12-slim, which is a lightweight base image. It is much smaller than a full Linux image, so builds are faster and containers are leaner. Then we set two Python environment variables:
PYTHONDONTWRITEBYTECODE=1prevents Python from generating.pycfilesPYTHONUNBUFFERED=1ensures logs appear immediately in the terminal
The WORKDIR /app instruction means all following operations happen inside /app in the container.
Then we install a few system dependencies:
build-essentialfor compiling some Python packages if neededlibpq-devfor PostgreSQL-related compilation and linkingnetcat-openbsdbecause we will use it in the entrypoint to wait for the database
Next, we copy requirements.txt first and install dependencies. This is useful because Docker can cache the dependency installation layer. If your application code changes but requirements.txt stays the same, Docker won’t reinstall everything from scratch.
Finally, we copy the Django project and the entrypoint script. That makes the image reusable for multiple services.
8. Step 4 — Create the entrypoint.sh script
Create entrypoint.sh:
#!/bin/sh

echo "Waiting for PostgreSQL..."

while ! nc -z db 5432; do
  sleep 1
done

echo "PostgreSQL started"

python manage.py migrate --noinput
python manage.py collectstatic --noinput

exec "$@"
Deep explanation
This file is very important.
A common beginner mistake is to assume that depends_on means the database is fully ready before Django starts. That is not always true. depends_on ensures startup order, but not service readiness. PostgreSQL may still be booting when Django tries to connect.
This script solves that problem. It repeatedly checks whether the db container is accepting connections on port 5432. Once the connection works, the script continues.
Then it automatically runs:
python manage.py migrate --noinputpython manage.py collectstatic --noinput
This means every time the web container starts, it applies database migrations and gathers static files. That makes the startup process more reliable and reduces manual work.
The final line:
exec "$@"tells the script to run the command passed by Docker Compose. That keeps the container process clean and lets signals be handled properly.
9. Step 5 — Create the environment file
Create .env:
DEBUG=1
SECRET_KEY=django-insecure-super-secret-change-me
DJANGO_ALLOWED_HOSTS=localhost 127.0.0.1 web nginx

POSTGRES_DB=mofidtech_db
POSTGRES_USER=mofidtech_user
POSTGRES_PASSWORD=mofidtech_pass
POSTGRES_HOST=db
POSTGRES_PORT=5432

REDIS_URL=redis://redis:6379/0
Deep explanation
This file centralizes configuration. That is extremely useful because environments change. On local development, your database host might be db, while in production it could be something else. The same applies to secrets, debug mode, and allowed hosts.
Using a .env file makes your project easier to maintain because you do not hardcode sensitive or environment-specific values into the source code. It also makes it easier to share the project structure with others, because only the environment values need to be changed, not the code.
10. Step 6 — Create the Django project
Now create the Django project inside app/.
cd app
django-admin startproject config .
python manage.py startapp core
python manage.py startapp tools
cd ..
11. Step 7 — Configure Django settings
Replace app/config/settings.py with:
import os
from pathlib import Path

BASE_DIR = Path(__file__).resolve().parent.parent

SECRET_KEY = os.environ.get("SECRET_KEY", "fallback-secret-key")
DEBUG = os.environ.get("DEBUG", "0") == "1"

ALLOWED_HOSTS = os.environ.get("DJANGO_ALLOWED_HOSTS", "").split()

INSTALLED_APPS = [
    "django.contrib.admin",
    "django.contrib.auth",
    "django.contrib.contenttypes",
    "django.contrib.sessions",
    "django.contrib.messages",
    "django.contrib.staticfiles",
    "core",
    "tools",
]

MIDDLEWARE = [
    "django.middleware.security.SecurityMiddleware",
    "django.contrib.sessions.middleware.SessionMiddleware",
    "django.middleware.common.CommonMiddleware",
    "django.middleware.csrf.CsrfViewMiddleware",
    "django.contrib.auth.middleware.AuthenticationMiddleware",
    "django.contrib.messages.middleware.MessageMiddleware",
    "django.middleware.clickjacking.XFrameOptionsMiddleware",
]

ROOT_URLCONF = "config.urls"

TEMPLATES = [
    {
        "BACKEND": "django.template.backends.django.DjangoTemplates",
        "DIRS": [BASE_DIR / "templates"],
        "APP_DIRS": True,
        "OPTIONS": {
            "context_processors": [
                "django.template.context_processors.request",
                "django.contrib.auth.context_processors.auth",
                "django.contrib.messages.context_processors.messages",
            ],
        },
    },
]

WSGI_APPLICATION = "config.wsgi.application"
ASGI_APPLICATION = "config.asgi.application"

DATABASES = {
    "default": {
        "ENGINE": "django.db.backends.postgresql",
        "NAME": os.environ.get("POSTGRES_DB"),
        "USER": os.environ.get("POSTGRES_USER"),
        "PASSWORD": os.environ.get("POSTGRES_PASSWORD"),
        "HOST": os.environ.get("POSTGRES_HOST", "db"),
        "PORT": os.environ.get("POSTGRES_PORT", "5432"),
    }
}

CACHES = {
    "default": {
        "BACKEND": "django_redis.cache.RedisCache",
        "LOCATION": os.environ.get("REDIS_URL", "redis://redis:6379/0"),
        "OPTIONS": {
            "CLIENT_CLASS": "django_redis.client.DefaultClient",
        },
    }
}

CELERY_BROKER_URL = os.environ.get("REDIS_URL", "redis://redis:6379/0")
CELERY_RESULT_BACKEND = os.environ.get("REDIS_URL", "redis://redis:6379/0")

LANGUAGE_CODE = "en-us"
TIME_ZONE = "Africa/Casablanca"
USE_I18N = True
USE_TZ = True

STATIC_URL = "/static/"
STATICFILES_DIRS = [BASE_DIR / "static"]
STATIC_ROOT = BASE_DIR / "staticfiles"

MEDIA_URL = "/media/"
MEDIA_ROOT = BASE_DIR / "media"

DEFAULT_AUTO_FIELD = "django.db.models.BigAutoField"
Deep explanation
This file is where Django learns how your whole environment works.
Database
We configure PostgreSQL instead of SQLite. That matters because SQLite is fine for small learning projects, but PostgreSQL is much closer to what is used in professional deployments. It handles concurrency, scaling, and reliability much better.
Cache
Redis is configured as Django’s cache backend. This allows the platform to store temporary values in memory. In a tools website, caching can be very useful for performance, rate limiting, computed outputs, or temporary tokens.
Static and media
We define:
STATICFILES_DIRSfor source static filesSTATIC_ROOTfor collected production static filesMEDIA_ROOTfor uploaded media
Nginx will later serve these files directly. This separation is important because Django is not the best tool for serving static assets in a production-style setup.
Environment-driven settings
By reading values from environment variables, we make the project flexible and portable. The exact same codebase can work on local development, staging, or production with different .env values.
12. Step 8 — Configure project URLs
Replace app/config/urls.py with:
from django.contrib import admin
from django.urls import include, path

urlpatterns = [
    path("admin/", admin.site.urls),
    path("", include("core.urls")),
    path("tools/", include("tools.urls")),
]
This means the root site will be handled by the core app and the tools section will be handled by the tools app.
13. Step 9 — Create the core app pages
Create app/core/urls.py:
from django.urls import path
from .views import home

urlpatterns = [
    path("", home, name="home"),
]
Create app/core/views.py:
from django.shortcuts import render

def home(request):
    return render(request, "core/home.html")
Deep explanation
The core app is a good place to put general pages such as homepage, about page, contact page, or dashboard pages. It keeps the project organized instead of mixing general pages with tool-specific logic.
14. Step 10 — Create the tools app pages
Create app/tools/urls.py:
from django.urls import path
from .views import tools_home, base64_tool

urlpatterns = [
    path("", tools_home, name="tools_home"),
    path("base64/", base64_tool, name="base64_tool"),
]
Create app/tools/views.py:
import base64
from django.shortcuts import render

def tools_home(request):
    tools_list = [
        {
            "name": "Base64 Encoder / Decoder",
            "description": "Encode and decode Base64 text directly in your browser.",
            "url": "/tools/base64/",
        }
    ]
    return render(request, "tools/tools_home.html", {"tools_list": tools_list})

def base64_tool(request):
    text = ""
    result = ""
    action = "encode"

    if request.method == "POST":
        text = request.POST.get("text", "").strip()
        action = request.POST.get("action", "encode")

        try:
            if action == "encode":
                result = base64.b64encode(text.encode("utf-8")).decode("utf-8")
            else:
                result = base64.b64decode(text.encode("utf-8")).decode("utf-8")
        except Exception:
            result = "Invalid input. Please provide valid text for the selected operation."

    context = {
        "text": text,
        "result": result,
        "action": action,
    }
    return render(request, "tools/base64_tool.html", context)
Deep explanation
This is our first real tool.
The tools_home view gives the project a platform feeling rather than a single-page demo. It introduces the idea that the website is a hub of utilities.
The base64_tool view accepts text input from the user and checks whether the requested action is encoding or decoding. It uses Python’s built-in base64 module. If decoding fails because the input is invalid, the error is caught and a friendly message is returned instead of a raw crash.
This matters because MofidTech-style tools should feel practical and user-friendly, not fragile. Even simple tools should handle bad input gracefully.
15. Step 11 — Create the Celery configuration
Create app/config/celery.py:
import os
from celery import Celery

os.environ.setdefault("DJANGO_SETTINGS_MODULE", "config.settings")

app = Celery("config")
app.config_from_object("django.conf:settings", namespace="CELERY")
app.autodiscover_tasks()
Edit app/config/__init__.py:
from .celery import app as celery_app

__all__ = ("celery_app",)
Deep explanation
Celery is not required for a tiny site, but it becomes very useful as soon as you have jobs that should not block the user request. For example:
- generating reports
- converting uploaded files
- sending emails
- refreshing cache
- scanning configs
- cleaning temporary data
This configuration tells Celery to use Django settings and automatically discover task files in installed apps.
16. Step 12 — Create a sample background task
Create app/tools/tasks.py:
from celery import shared_task
from django.core.cache import cache
from datetime import datetime

@shared_task
def update_tool_stats():
    now = datetime.now().strftime("%Y-%m-%d %H:%M:%S")
    cache.set("last_tool_stats_update", now, timeout=None)
    return f"Updated at {now}"
Deep explanation
This is a very simple example, but it proves that Celery works. The task writes a timestamp into the cache.
In a more advanced MofidTech project, tasks could do things like:
- delete expired temporary downloads
- compute daily tool usage counts
- prepare exports
- process uploaded files
- warm up cache entries
The principle is important: work that should happen in the background belongs in Celery, not inside the web request.
17. Step 13 — Add scheduled task support
Add this at the bottom of settings.py:
CELERY_BEAT_SCHEDULE = {
    "update-tool-stats-every-minute": {
        "task": "tools.tasks.update_tool_stats",
        "schedule": 60.0,
    },
}
Deep explanation
Celery Worker executes tasks. Celery Beat schedules tasks.
That distinction is important:
- Worker = does the job
- Beat = decides when to launch the job
With this configuration, every minute, Beat will trigger update_tool_stats. This is a small demonstration of scheduled automation. On a real site, that could support analytics, cleanup jobs, maintenance tasks, or background data refresh.
18. Step 14 — Create the base template
Create app/templates/base.html:
<!DOCTYPE html>
<html lang="en">
<head>
    <meta charset="UTF-8">
    <meta name="viewport" content="width=device-width, initial-scale=1.0">
    <title>{% block title %}MofidTech{% endblock %}</title>
    <link rel="stylesheet" href="/static/css/style.css">
</head>
<body>
    <header class="site-header">
        <div class="container">
            <div class="brand-row">
                <a href="/" class="brand">MofidTech</a>
                <nav class="main-nav">
                    <a href="/">Home</a>
                    <a href="/tools/">Tools</a>
                    <a href="/admin/">Admin</a>
                </nav>
            </div>
        </div>
    </header>

    <main class="container main-content">
        {% block content %}{% endblock %}
    </main>

    <footer class="site-footer">
        <div class="container">
            <p>© MofidTech - Docker Compose Demo Project</p>
        </div>
    </footer>
</body>
</html>
Deep explanation
A base template lets you avoid repeating the same HTML structure across every page. That is very important in Django projects because consistency matters. If later you want to change the header, navigation, or footer, you only update one file.
This is also the foundation of a more polished MofidTech user interface. As the platform grows, the base layout becomes the backbone for all pages.
19. Step 15 — Create the homepage template
Create app/templates/core/home.html:
{% extends "base.html" %}

{% block title %}Home - MofidTech{% endblock %}

{% block content %}
<section class="hero">
    <h1>Welcome to MofidTech</h1>
    <p>
        MofidTech is a growing platform of practical developer tools, tutorials, and utilities.
        This demo project shows how Django, PostgreSQL, Redis, Celery, and Nginx can work together
        using Docker Compose in a realistic architecture.
    </p>
    <p>
        Instead of running each part manually, Docker Compose defines the full environment in one place,
        making the project easier to run, maintain, and scale.
    </p>
    <a class="btn" href="/tools/">Explore Tools</a>
</section>
{% endblock %}
20. Step 16 — Create the tools home template
Create app/templates/tools/tools_home.html:
{% extends "base.html" %}

{% block title %}Tools - MofidTech{% endblock %}

{% block content %}
<h1>Developer Tools</h1>
<p class="intro">
    Browse practical utilities designed to help developers work faster and better.
</p>

<div class="tool-grid">
    {% for tool in tools_list %}
        <div class="tool-card">
            <h2>{{ tool.name }}</h2>
            <p>{{ tool.description }}</p>
            <a class="btn" href="{{ tool.url }}">Open Tool</a>
        </div>
    {% endfor %}
</div>
{% endblock %}
21. Step 17 — Create the Base64 tool template
Create app/templates/tools/base64_tool.html:
{% extends "base.html" %}

{% block title %}Base64 Tool - MofidTech{% endblock %}

{% block content %}
<div class="tool-page">
    <a class="back-link" href="/tools/">← Back to Tools</a>

    <h1>Base64 Encoder / Decoder</h1>
    <p>
        Encode plain text into Base64 or decode Base64 back into readable text.
        This is a simple but useful example of a real MofidTech-style online tool.
    </p>

    <form method="post" class="tool-form">
        {% csrf_token %}
        <label for="text">Input</label>
        <textarea id="text" name="text" rows="12">{{ text }}</textarea>

        <div class="button-row">
            <button type="submit" name="action" value="encode">Encode</button>
            <button type="submit" name="action" value="decode">Decode</button>
        </div>
    </form>

    <div class="result-box">
        <h2>Result</h2>
        <pre>{{ result }}</pre>
    </div>
</div>
{% endblock %}
Deep explanation
This page is intentionally simple but structured like a usable tool page. It has:
- a return link
- an explanation
- an input area
- action buttons
- a result section
This matters because users of utility sites expect a clean workflow. Even if the backend logic is simple, the interface should guide the user clearly.
22. Step 18 — Add CSS styling
Create app/static/css/style.css:
body {
    margin: 0;
    font-family: Arial, sans-serif;
    background: #f5f7fb;
    color: #222;
}

.container {
    width: 90%;
    max-width: 1100px;
    margin: 0 auto;
}

.site-header {
    background: #0d47a1;
    color: white;
    padding: 18px 0;
}

.brand-row {
    display: flex;
    justify-content: space-between;
    align-items: center;
}

.brand {
    color: white;
    text-decoration: none;
    font-size: 1.5rem;
    font-weight: bold;
}

.main-nav a {
    color: white;
    text-decoration: none;
    margin-left: 18px;
}

.main-content {
    padding: 40px 0;
}

.hero {
    background: white;
    padding: 32px;
    border-radius: 12px;
    box-shadow: 0 2px 12px rgba(0,0,0,0.08);
}

.intro {
    margin-bottom: 24px;
}

.tool-grid {
    display: grid;
    grid-template-columns: repeat(auto-fit, minmax(260px, 1fr));
    gap: 20px;
}

.tool-card {
    background: white;
    padding: 24px;
    border-radius: 12px;
    box-shadow: 0 2px 12px rgba(0,0,0,0.08);
}

.btn,
button {
    display: inline-block;
    background: #1565c0;
    color: white;
    text-decoration: none;
    border: none;
    padding: 10px 16px;
    border-radius: 8px;
    cursor: pointer;
}

textarea {
    width: 100%;
    padding: 12px;
    border: 1px solid #ccc;
    border-radius: 8px;
    box-sizing: border-box;
    font-family: monospace;
}

.tool-page,
.result-box {
    background: white;
    padding: 24px;
    border-radius: 12px;
    box-shadow: 0 2px 12px rgba(0,0,0,0.08);
    margin-bottom: 20px;
}

.button-row {
    margin-top: 12px;
    display: flex;
    gap: 10px;
}

.back-link {
    display: inline-block;
    margin-bottom: 12px;
    color: #1565c0;
    text-decoration: none;
}

.site-footer {
    margin-top: 40px;
    background: #e3eaf4;
    padding: 20px 0;
    text-align: center;
}
Deep explanation
Styling is not just decoration. A clean interface increases clarity and usability. This CSS gives the project a lightweight professional look with cards, spacing, and readable sections. It is still simple enough for learning, but it already feels like a structured platform rather than an unfinished prototype.
23. Step 19 — Create the Docker Compose file
Create docker-compose.yml:
version: "3.9"

services:
  web:
    build: .
    container_name: mofidtech_web
    command: /entrypoint.sh gunicorn config.wsgi:application --bind 0.0.0.0:8000
    volumes:
      - ./app:/app
      - static_volume:/app/staticfiles
      - media_volume:/app/media
    env_file:
      - .env
    depends_on:
      - db
      - redis
    expose:
      - "8000"

  db:
    image: postgres:16
    container_name: mofidtech_db
    volumes:
      - postgres_data:/var/lib/postgresql/data/
    env_file:
      - .env

  redis:
    image: redis:7
    container_name: mofidtech_redis

  celery_worker:
    build: .
    container_name: mofidtech_celery_worker
    command: celery -A config worker --loglevel=info
    volumes:
      - ./app:/app
    env_file:
      - .env
    depends_on:
      - db
      - redis

  celery_beat:
    build: .
    container_name: mofidtech_celery_beat
    command: celery -A config beat --loglevel=info
    volumes:
      - ./app:/app
    env_file:
      - .env
    depends_on:
      - db
      - redis

  nginx:
    image: nginx:latest
    container_name: mofidtech_nginx
    ports:
      - "80:80"
    volumes:
      - ./nginx/default.conf:/etc/nginx/conf.d/default.conf
      - static_volume:/app/staticfiles
      - media_volume:/app/media
    depends_on:
      - web

volumes:
  postgres_data:
  static_volume:
  media_volume:
Deep explanation
This file is the center of the project.
web
This service builds the Django image and runs Gunicorn through the entrypoint script. It mounts the local app/ folder into the container so code changes appear immediately during development.
db
This service runs PostgreSQL. Its data is stored in a named Docker volume so database contents survive container restarts.
redis
This service provides an in-memory data store. Django can use it as a cache, and Celery uses it as a broker.
celery_worker
This service runs background tasks.
celery_beat
This service schedules recurring tasks.
nginx
This service receives HTTP traffic on port 80 and forwards dynamic requests to Django while serving static and media files itself.
The Compose file is powerful because instead of memorizing many container commands, you define the whole environment once and run it consistently every time.
24. Step 20 — Configure Nginx
Create nginx/default.conf:
server {
    listen 80;
    server_name localhost;

    location /static/ {
        alias /app/staticfiles/;
    }

    location /media/ {
        alias /app/media/;
    }

    location / {
        proxy_pass http://web:8000;
        proxy_set_header Host $host;
        proxy_set_header X-Real-IP $remote_addr;
        proxy_set_header X-Forwarded-For $proxy_add_x_forwarded_for;
        proxy_set_header X-Forwarded-Proto $scheme;
    }
}
Deep explanation
Nginx is the public-facing server. It is excellent for serving static files and proxying requests efficiently.
When a user requests /static/css/style.css, Nginx serves it directly from the static volume. When a user requests /tools/base64/, Nginx forwards the request to the Django app.
This division of work is better than asking Django to handle everything itself. Nginx is fast and efficient at serving files, while Django focuses on application logic.
25. Step 21 — Run the project
Build and start everything:
docker compose up --buildThen open:
http://localhostYou should see the homepage.
You can also open:
http://localhost/tools/and then:
http://localhost/tools/base64/26. Step 22 — Create an admin user
In another terminal:
docker compose exec web python manage.py createsuperuserThen visit:
http://localhost/admin/This is useful because even if the current project is small, the Django admin is one of the fastest ways to manage models, content, and platform data as the site grows.
27. Step 23 — Useful Docker Compose commands
docker compose ps
docker compose logs web
docker compose logs db
docker compose logs redis
docker compose logs celery_worker
docker compose logs celery_beat
docker compose logs nginx
docker compose down
Deep explanation
Running containers is only part of the job. Inspecting them is just as important.
psshows what is runninglogshelps debug errorsdownstops and removes the running containers
These commands are essential because real projects rarely work perfectly on the first try. Logs are one of the most important debugging tools in Docker environments.
28. Step 24 — Common problems and why they happen
Problem 1: Database connection error
Example:
connection to server at "db" failedThis usually happens because Django tried to connect before PostgreSQL was ready, or because the environment values are wrong. That is why the entrypoint.sh waiting logic is useful.
Problem 2: Static files missing
If the site loads but CSS does not appear, it often means:
collectstaticdid not run- Nginx alias path is wrong
- volume mapping is wrong
That is why static files are collected into staticfiles/ and shared with Nginx through a named volume.
Problem 3: Celery not working
This usually means one of these:
- Redis is not running
- Redis URL is wrong
- Celery service cannot import Django settings
- task name is wrong in Beat schedule
This is why it helps to test gradually: first the web app, then Redis, then the worker, then the scheduler.
29. Step 25 — Why Docker Compose is better than manual commands here
Without Docker Compose, you would have to manually:
- start PostgreSQL
- start Redis
- run Django migrations
- collect static files
- start Gunicorn
- start Celery worker
- start Celery Beat
- configure Nginx separately
That is a lot of manual work and a lot of room for mistakes.
With Docker Compose, all of that becomes reproducible. That is one of the main ideas behind modern infrastructure: not just making things run, but making them run the same way every time.
30. Step 26 — Strong next improvements
The next improvements would be:
- add Bootstrap-based UI
- create a real
base_full.html - add tool cards with icons
- add “Back to Tools” button styling
- add better textarea/result layout
- add copy-to-clipboard buttons
- add token-based downloads
- add Redis-backed temporary storage
- add Celery tasks for cleanup of expired files
- add Nginx HTTPS support
- add
.env.prodand production compose override
Those upgrades would transform this from a learning project into a serious deployable tool platform.
31. Final conclusion
This project teaches Docker Compose the right way: through a real multi-service application, not just a toy example. You learn how services are separated, how they communicate, how startup dependencies are handled, how background tasks are integrated, how static files are served, and how a container-based architecture supports growth. That is much more valuable than memorizing a few YAML lines without understanding the larger system.











💬 Comments
No comments yet. Be the first to comment!
Login to comment.